blankblank blank


Archive for the 'GPX' Category Page 2 of 5


Another Tool For Identifying Garmin Map Tiles

A few months ago, I covered GMapTool, a program that lets you identify the name and coverage area of a Garmin .img map file, whose only outward identifying info is a cryptic 8-digit filename that doesn’t reflect anything about its contents. Some people who have download the most recent version of GMapTool have reported getting virus warnings from their AV programs. I’ve checked GMapTool with MS Security Essentials (a terrific free AV program, BTW; unobtrusive, and doesn’t use a lot of system resources) and Avast antivirus, and neither one has spotted a problem – I suspect that the warnings are a false positive, though I can’t be sure.

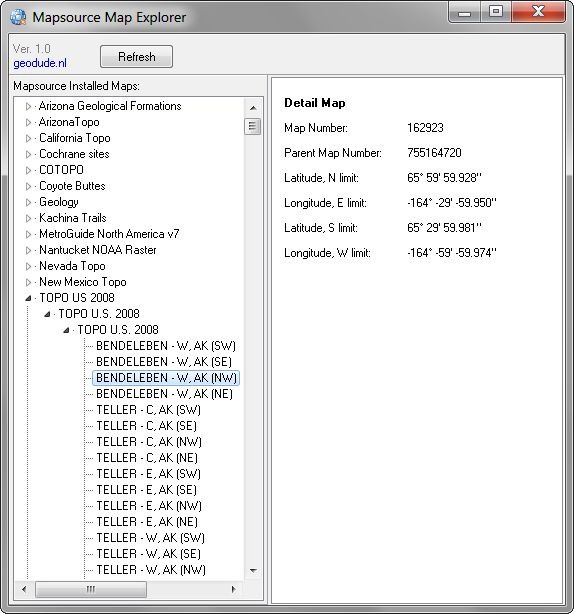
Regardless, if you’re leery of using GMapTool because of the virus warnings, an alternative program is Mapsource Map Explorer. It doesn’t have the additional capabilities of GMapTool to split and combine .img map files, plus it only works on maps installed in MapSource (GMapTool can work on any .img file in a directory, not just those installed in MapSource). But if all you want is data characteristics for a set of installed map tiles, it does the job:

MapSourceExplorer

While the identifying map number may have less than 8 digits (e.g. “”162923” above), the .img filename for that map tile will have enough leading zeroes to pad out the name to 8 digits, i.e. “00162923.img”.


Draw Freely On Google Maps, Export In Multiple Formats

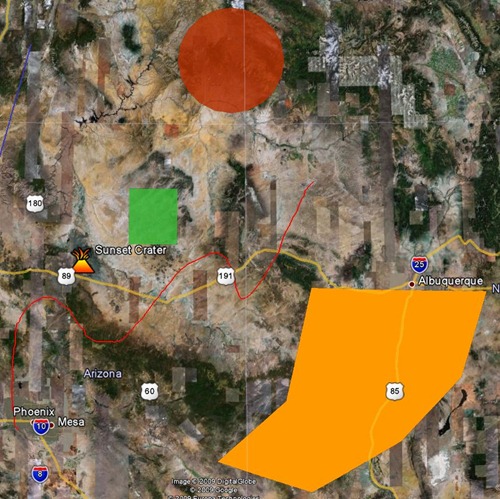
ScribbleMaps is one of the slickest Google Maps apps I’ve ever seen. Draw and/or place any of the following on a Google Map view:

  • Freehand lines
  • Straight lines
  • Circles
  • Rectangles
  • Arbitrary shapes
  • Text
  • Images (needs a web link to the image)
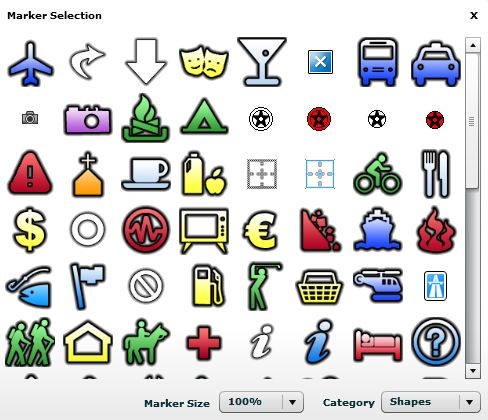
  • Standard Google Map/Earth placemark icons (select from multiple sets):

placemarks

You also have control of the color, opacity and line thickness from the toolbar, along with the ability to search for locations:

scribblemapcontrols

Once the shapes are created, you can move them, modify them by shifting vertices, rotate them, or erase them. Once done with your map, you have multiple export options:

  • JPEG
  • Print directly from browser
  • Embeddable widget (no Google Maps API key required):

  • Facebook map
  • Regular Google Maps view
  • Google Earth plugin (though this didn’t work for me)
  • KML file (for viewing in Google Earth)

scribblemapsGE

  • GPX (for export to your GPS); only exports points and lines, the only geometric shapes that GPX files support

You can also save your map for future editing, and get a dedicated web link for it; you choose a password for it so that only you can edit it, or delete it later.

Very slick, and very cool; I’m putting ScribbleMaps into my main bookmarks list.


Quick GPX Viewing In A Google Maps Interface With GPXViewer

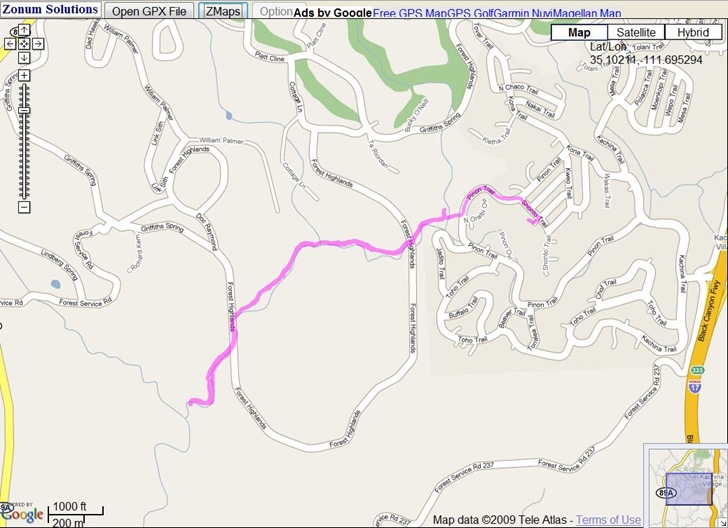
It’s nothing fancy, but Zonum’s GPXViewer website lets you upload a GPX file (points and tracks), and then quickly plots it in a Google Maps interface:

gpxviewerz

No editing, export or additional info in this app, just display; but Zonums has other web apps like Digipoint and MapTool for that.


MapTool Goes To Version 2– Elevations, Areas, And Distances In Google Maps

I’ve covered Zonums Software free online application MapTool before; the original version let you determine the elevation of a point in a Google Maps interface, as well as measuring the length of a multi-segment path or drawn polygon, but not much more. Zonums has recently updated this application to  MapTool 2, which adds some really nice new functions (most accessible by clicking on the Options link at top):

  • Create vertices by manually entering coordinates, in addition to previous option of clicking on map (use Input link at the top for this)
  • Continuous coordinate read-out in both latitude/longitude and UTM
  • Divide a drawn line into equal parts by automatically adding equally-spaced vertices, or add vertices with a user-defined spacing
  • Convert a drawn polygon into a polyline, and vice versa
  • Edit individual vertices in a line or polygon
  • Get a count of the total number of vertices in the drawn feature
  • Get an elevation profile for all the vertices on a line

profile

  • Determine the extents (bounding box) for the drawn feature
  • Export the vertex coordinates as a text file
  • Export the line or polygon directly as a GPX, DXF or shapefile in latitude/longitude/WGS84, with the option to include vertex elevations


Curing Garmin Blue Flag Waypoint Disease

I’ve been asked this question twice already, which is good enough for me to write a post about it. If you use any of the color Garmin eTrex or GPSMap series, you’ll quickly discover that the default waypoint symbol, a blue flag, is pretty useless. It takes up a huge amount of screen space, and if you have multiple waypoints spaced closely together, it can become impossible to differentiate them. This is especially when the display is zoomed out to a lower scale:
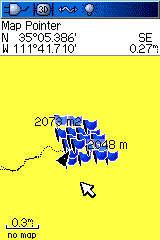
blueflagdisease

There are a number of ways to deal with this problem.

1. Set the waypoints zoom level so that they don’t appear until you’ve zoom in.

The default setting for waypoints to display is Auto, which usually means that they’ll show up at virtually every zoom level. But you can set a specific zoom level so that waypoints don’t appear until you reach that zoom. From Setup Map – Points:
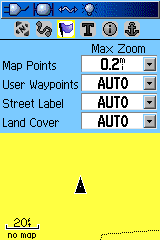
autowaypoints

Change the User Waypoints setting to the desired zoom level at which waypoints will first appear. E.g., the 800-ft. zoom:
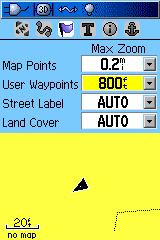
800ftzoom

Since you’re zoomed in closer to the waypoints when they show up, they’ll be spaced more widely. But if you actually want them visible when zoomed out to a lower scale, you’ll need to do something else.

2. Change the default waypoint symbol on the Garmin unit to something smaller.

When you create a new waypoint on your Garmin, the waypoint icon used is the same as the last one used. If you’ve never changed the waypoint icon, that will be a blue flag. You can change the waypoint icon in the waypoint creation screen by moving the yellow highlight box using the arrow keys:
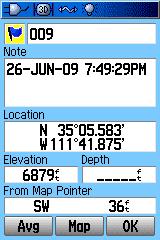
waypointhighlight

Then press Enter, and choose a smaller icon:
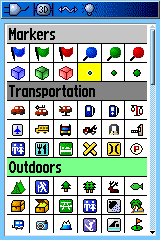
smallicon

I like the small green dot because it takes up far less display space than just about any other symbol. But you can choose any icon you want; or see my series on creating custom Garmin waypoint symbols if you want to design your own. Once you’ve selected a new waypoint symbol, it will be used for all subsequent waypoints you create on your Garmin.

3. Use MapSource to modify the waypoint icons.

Unfortunately, there’s no way on your Garmin GPS unit to bulk convert waypoint icon symbols created on your Garmin; you have to edit them on the unit one at a time. But if Garmin’s MapSource program (aka Trip and Waypoint Manager) came with your GPS or with a mapset you’ve purchased, you can easily do a symbol conversion, either one at a time or in bulk.

a. Use MapSource to download the waypoints from your GPS.

b. Click on the Waypoints tab to bring up a list of waypoints
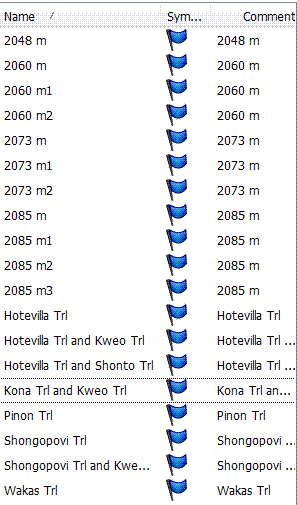
Waypoint list

c. To change the icon for a single waypoint, right-click on the waypoint in the list and choose Waypoint properties; or, from the map, right-click on a waypoint and choose Waypoint Properties. This brings up a dialog box with a icon symbol selection drop-down:
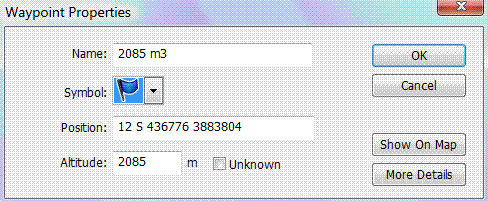
waypointproperties

d. To change the symbol for multiple waypoints, Ctrl-click on them in the Waypoint list; to select all the waypoints, click in the Waypoint list and then press Ctrl-A. Then right-click on any selected waypoint, and choose a symbol; your choice will be applied to all the waypoints. You can then save these waypoints in a file, or export them directly back to your GPS. For the latter, you might want first to delete the old waypoints with the undesired symbol; Garmin unit give you the option in the Waypoints listing screen to delete all waypoints that share the same symbol.

Having done this with the waypoints in the first image, converting them to green dots:
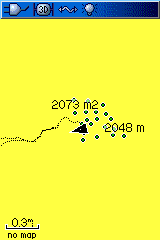
greendots

You can now differentiate different waypoints, where before they were a mass of indistinguishable blue flags.

This is also a useful technique to use when creating waypoints in a program that doesn’t support Garmin waypoint icons directly, like USAPhotoMaps; loading waypoints directly from a program like this into a Garmin GPS may result in Blue Flag Disease. Create the waypoints in this program, then save them as a GPX file and load them into MapSource. You can then use the above process to select your desired waypoint icons, and load them into the GPS.

4. Use GPS TrackMaker to modity the waypoint icons

If you don’t own MapSource, you can use the free program GPS Trackmaker to import waypoints from a Garmin, or from a GPX file, and then modify they waypoint icons. One at a time is easy – with the cursor in “Select data” mode (white arrow), move the cursor to near the waypoint until a black circle appears. Right-click on that black circle to bring up the Edit Waypoint window:
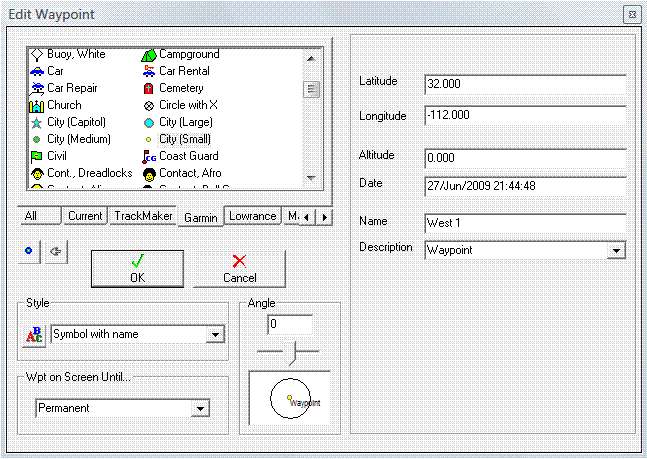
gpstm edit

Click on the Garmin tab to see only Garmin-compatible symbols, then choose a new symbol from the icons visible in the window. You can then upload the icons directly to your Garmin from the GPS menu, or save them as a GPX file.

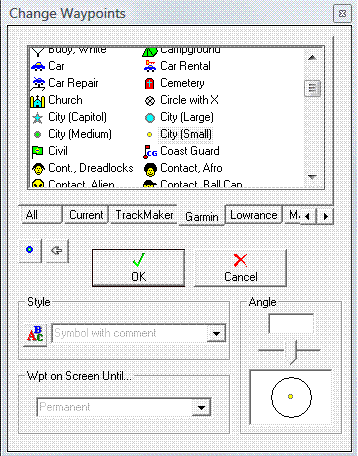
Bulk conversion is also pretty easy. Use the Select data cursor to select all of the waypoints you want to change (click-and-drag to select a rectangular box). From the menu at top, select Tools => Waypoints =>  Change Selected Wpts … . A window similar to the one above will come up:
gpstm bulk

As before, choose the Garmin tab, then select the icon you want to use. Save it as a GPX file, or upload directly to your Garmin.

LandSerf – Google Earth And GPS Functions

In previous posts, I reviewed LandSerf’s raster terrain analysis functions and vector functions. Today I’ll wrap up with a short review of LandSerf’s Google Earth and GPS functions.

Google Earth: The most notable Google Earth functionality is the ability to export vector data, either imported or generated by the program, into KML vector files. So I can open a DEM, like the sample one of Mt. Rainier included with the program:

lsdem

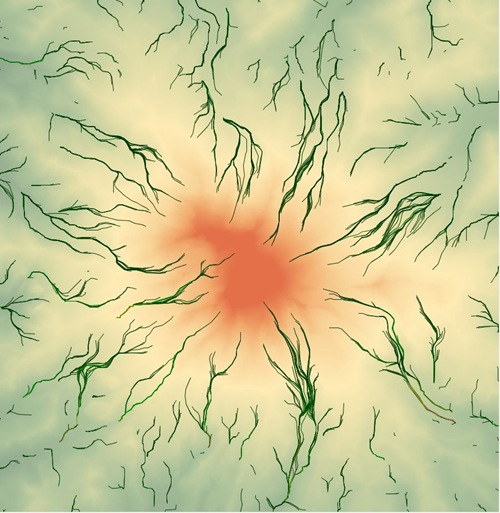
Generate a set of flow vectors for the DEM:

flowvectors

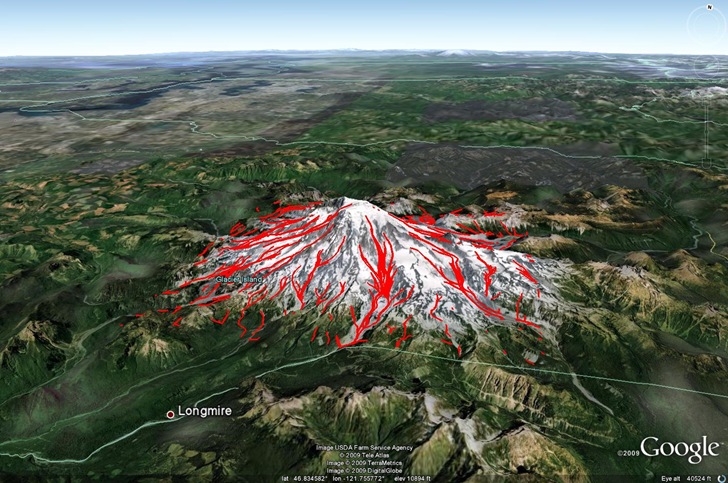
And then export the vector data as a KML file:

rainier

You could do something similar with a shapefile opened in LandSerf, but just be sure the shapefile is in NAD83 or WGS84. As I mention in the post on LandSerf vector functions, LandSerf has problems re-projecting from one datum to a significantly different second datum, and Google Earth data needs to be in WGS84 (NAD83 is almost the same). A search for “KML shapefile” on this blog will bring up a number of other programs that do a better job of converting shapefiles to KML, including preserving attribute data, which LandSerf doesn’t. But all of those are Windows-based; LandSerf runs on Macintosh and Linux, so it might be a useful option for those OSes.

Note: You should save vector data as a KML file; the KMZ file format is supposedly reserved for saving raster data as Google Earth image overlays, but I’ve been unsuccessful in getting that to work.

GPS: The list of useful GPS functions in LandSerf is a bit longer:

  • Convert loaded shapefiles or other vector data to GPX format (data must be in WGS84/NAD83 datum)
  • Load a GPX file as vector data, then save it in any of the vector formats LandSerf supports
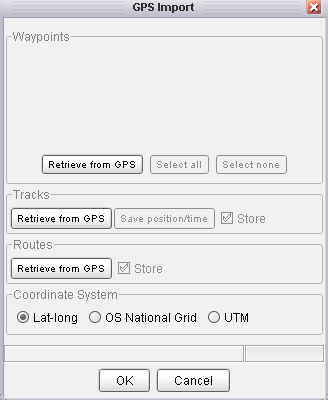
  • Interface directly with a GPS. You’ll need to have the GPS connected to your computer and turned on before starting up LandSerf. To establish a connection to the GPS, use Configure=>GPS and scan for a connected unit. Once you do this, you can import waypoint data using the File=>Import from GPS function. While the dialog box gives you the option to import waypoints, tracks and routes:

gpsimport

I’ve had difficulty getting tracks to import successfully – the program just shuts down on me. This may just be an issue with my model GPS (Garmin 60Cx); f you have better luck, let me know. You can import the data in the default lat/long coordinate system. or re-project it on import to OSNG or UTM. Once there, you can export it in GPX, shapefile or other vector format.

  • You can also export point data (no lines or polygons) directly from LandSerf to a connected GPS as waypoints.

If you can get track data to import successfully from your GPS to LandSerf, which I couldn’t, there are several other functions that might prove useful:

  • On importing the data, you have the option of saving all the track data in spreadsheet format with position, elevation and time
  • As with other vector data, if you have a digital elevation model loaded in the program, you can get a elevation profile plot; see this previous LandSerf post for more info
  • If you have a GPS track that is broken into .segments because you lost the GPS signal, LandSerf has the ability to join all of the line segments into a single line, which you can then save as a GPX track file, using the Edit => Join vector lines function. AFAIK, it’s the only free program that can do this.

As with the Google Earth functions, there are other programs that can do most of this in Windows, but far fewer free options in Macintosh and Linux.


Online GPS Format Conversion And Track Creation With GPSies

GPSies is a site whose primary function seems to be as a social site where you can upload tracks of your travels, and have them posted on a map to keep track of them or share them with others. Tracks can be uploaded from standard formats like GPX or KML, directly from Garmin GPS using the Garmin Communicator plugin, or from the iPhone using their free app. This social aspect isn’t something I’m all that interested in doing, so those features are wasted on me. But the site has two tools that GPS users will find useful:

Continue reading ‘Online GPS Format Conversion And Track Creation With GPSies’


Digipoint, Export Of Google Maps Point Coordinates, Upgraded To Version 3

I’ve posted before about Digipoint (version 1 and version 2), a web app that lets you select points in a Google Maps interface, then export their coordinates in a variety of formats. Version 3 of Digipoint is now out, with some modest improvements:

  • A new interface, a bit easier to use, and which works better in browsers where the default font size has been modified
  • Fly-to: Specify an address, country, or location, and the map will automatically go there. There are also a limited number of pre-specified country/region links, where  clicking on the link takes you to the area automatically
  • In previous versions, you had to copy/paste text for a particular export format like CSV or KML; you can now download the file automatically
  • For exported shapefiles, a corresponding prj file is also created to specify the coordinate system (your choice of geographic or UTM; WGS84)
  • Help section added

Still supports the same export formats as before: CSV, TXT, TAB, BLN (Surfer), GPX, KML, DXF and shapefile. Versions one and two are still available if you want them, but there’s no good reason to use them anymore.