blankblank blank


Archive Page 4 of 106


A Review Of The Garmin 62s GPS, Part II – Interface and Maps

Continuing on from Part I yesterday, today I’ll look at the interface on the Garmin 62s, and how it displays and handles maps.

Interface

I absolutely hated the touchscreen interface on the Oregon 450t I reviewed last year; doing even simple operations like creating a waypoint took multiple screen presses and changes. With the hardware buttons on the 62s, most of my objections no longer apply. A single button press can create a waypoint, and you can switch between different information screens (satellites, map, compass, trip info, waypoints, tracks) with just a few button pushes. Info screen order can be customized to show only a few screens, or all 24 available ones. You’re giving the option of flipping through full info screens sequentially, the default on my older Garmin 60Cx model, or using Garmin’s new Page Ribbon interface, which pops up a scrollable horizontal list of the info screens available, so you can jump immediately to the one you want:

181

And you can set up multiple profiles with different sets of info screens and  other configurations (tones, interface, units, etc.). This is a big step up from my old Garmin 60Cx, with only one profile configuration, and makes using the unit far more flexible.

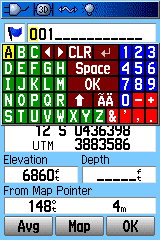
The one downside to the 62s’s interface compared to the Oregon series is that inputting letters/numbers is easier with the Oregon’s touchscreen interface; with the 62s, you have to use the cursor pad to scroll across a keyboard to select individual characters. Even so, they’ve improved the keyboard dramatically from the old 60Cx and eTrex version, by expanding it and making separate keyboards for letters, numbers and symbols:
 

60cxkey
Garmin 60Cx keyboard
47
Garmin 62s keyboard

You can switch between different keyboards on the 62s with the buttons at lower left/right, or use the In/Out zoom buttons. While it’s not as easy as a touchscreen, it’s still not bad. Overall, the 62s interface is a substantial improvement from that on the 60Cx; two thumbs up.

Maps

Newer Garmin models, like the 62s and Oregon/Dakota/Colorado series, support both vector and raster map data.

Vector

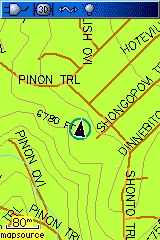
There’s no denying that the Garmin vector map ecosystem is bigger and better than for either of its main competitors, DeLorme and Magellan. There’s a wide variety of map types available for purchase from Garmin, and any old mapsets you currently have will also work on this system. I have an old Garmin Roads and Recreation mapset from 1999 that still works fine on this new model; comparable Magellan mapsets from the same era either don’t work, or require complete reformatting. What’s more, they’ve modified the map styles on some maps to make them much easier to view. Compare these screenshots of the same topo map view from an old Garmin 60Cx and the new 62s; the maps on the 62s are much easier to view, especially in daylight conditions:
topo60cx
Garmin 60Cx
130
Garmin 62s

Having said that, the base 62s comes only with a very rudimentary basemap installed, and you’ll really need to get additional maps to get full use out of it. Compare that with DeLorme PN-60 model, which comes with a full US road and topo mapset (1:100K equivalent); or the newer Magellans, available with a full 1:24K-equivalent topographic map covering the entire US. Garmin really needs to start including better map data with their base units, if they want to stay competitive.

The 62s is also fully compatible with most custom vector mapsets created by hobbyists over the years using free or cheap tools; see my series on Garmin vector map tools for more info. These include all the 1:24K-equivalent US topo maps at the GPS File Depot site, which are completely free and of comparable quality to Garmin’s paid (and expensive) equivalents. Getting vector map data on a DeLorme requires their xMap software, which I believe is available for new purchasers of PN-series models like the PN-40 and PN-60 at a discounted price of $150. Magellan really doesn’t have any comparable legitimate capability; there are some people creating custom vector maps for Magellan units, but you have to use pirated software and a convoluted process to create them.

Also supported are custom map types, where you can redefine symbol sets for points, lines and areas to whatever you want. Excellent examples of what can be done with this capability are available in the New Jersey section of the GPS File Depot maps; Boyd has used this custom styling to create vector maps that look very similar to USGS raster topos. One exception to custom map type support are the vectorized raster maps generated by my Moagu utility; these take advantage of hardware quirks specific to the older 60Cx/60CSx models, as well as some eTrex models, and these quirks have been removed from the newer Garmin models. However, vectorized raster maps created by programs like MapWel or BMap2MP work quite well on the 62s (as well as Oregon/Dakota/Colorado models). My Moagu utility has a GUI front-end for BMap2MP with settings optimized for USGS topographic maps; these maps display almost as quickly as raster Custom Maps versions (more on this below), without Custom Maps’ restrictions on map size. Using this approach, you could get several dozen USGS topo maps at full resolution on a 62s or comparable newer Garmin unit, versus 6-8 using Custom Maps. Below is a screenshot from a 62s showing a USGS topo map creating using BMap2MP with the Moagu GUI and optimizations:

318


Raster

The newer Garmin models can support raster imagery, like scanned maps and aerial photography, directly. There are two ways to get this kind of imagery on a Garmin unit.

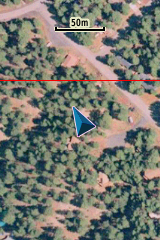
1. Garmin has a subscription service for world aerial imagery, called BirdsEye Imagery. For $30 a year, you get a subscription for unlimited downloads of aerial imagery (and nothing else); Garmin claims sub-meter resolution, but my local maps appear to be at about 1-meter resolution, and I’ve heard people in countries outside the US complain about poor data for their area. Download map data requires that you have Garmin’s BaseCamp software installed on your system, and a compatible Garmin unit connected to your computer. You can download sample data in BaseCamp, covering about one square kilometer, even without a subscription, so that you can check it out before buying it. Map data expires when the subscription expires. At least for my area, the aerial imagery is pretty good:
390

However, Garmin’s subscription service falls well short of what you can get from DeLorme’s comparable subscription service. DeLorme offers not only aerial imagery, but also USGS topographic maps and marine charts, for the same $30 subscription price. They also offer a separate subscription to Digital Globe satellite imagery, which offers 30-cm resolution across the world. You can also get Garmin BirdsEye topographic maps for some European countries, but it’s a la carte instead of subscription; $30 buys you up to 600 sq. km of topographic maps like OS maps for the United Kingdom; sounds like a lot, but it’s only an area of roughly 25 km x 25 km on a side, which really isn’t that big. On the other hand, Magellan has no comparable subscription service.

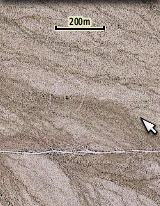
2. In October 2009, Garmin added a new feature to the Colorado/Oregon/Dakota/62/78 series called “Custom Maps”. You can take a scanned map or aerial photograph, calibrate it in Google Earth, then export it as a KMZ file for viewing on your GPS unit; here’s an example:
605

It’s a nice feature, and it’s great that Garmin added it for free, but there are issues:

a. The maximum image size you can create is about one megapixel; larger images will have their quality automatically degraded. You can get around this limitation using programs like G-Raster, mapc2mapc or OKMap, which can chop a larger image into smaller subtiles that meet this size restriction.

b.  A bigger problem is that there’s a maximum limit of 100 raster image tiles that can be viewed on a Garmin unit. Many people have asked Garmin to increase this limit, but so far Garmin hasn’t done so. They claim that it’s due to performance issues, but I have to believe that’s nonsense. It should be trivially easy to modify the unit’s software so that only maps in your current location were active, or to give people the option to disable/enable Custom Map files using the unit’s map manager, but Garmin hasn’t implemented either of those. I suspect they’re afraid that people will use Custom Maps instead of their BirdsEye subscription series, but given the extra steps required for Custom Maps, and convenience of BirdsEye imagery, I don’t really see this as a valid reason, especially on a unit as expensive as this one.

And BirdsEye imagery currently only includes aerial photography for the US, and not other commonly-desired raster imagery like topographic maps; if they’re not going to expand the range of imagery offered by that service, why not give users the ability to add as much of their own imagery as they want? As someone who was using my Moagu software to vectorize raster maps for Canada told me, Garmin’s BirdsEye service does them no good if it doesn’t offer the maps he needs, and Custom Maps doesn’t help if the total number of maps he wants on his unit exceeds their limits. There are people out there trying to reverse-engineer Garmin’s BirdsEye format so that you can create your own maps using that format, without the limitations of Custom Maps. But since this requires modifying your GPS unit’s firmware, and possible violations of the DMCA, I’m steering clear of that option.

By contrast, DeLorme’s xMap software lets you put any raster imagery you want on their PN GPS models (as well as GIS vector data like shapefiles). While it’s expensive at $150 (with a PN purchase), the combined cost of the most expensive PN model (PN-60) plus xMap software is comparable to the price of the 62s alone. So if the ability to put any maps you want onto your GPS is a requirement, you might want to give the DeLorme units a serious look. There are ways to put custom raster imagery on newer Magellan units, but they’re not exactly user-friendly yet.


Map management

You can install maps onto the 62s and similar models using Garmin’s old warhorse software, MapSource. However, Garmin seems to be slowly de-emphasizing that software in favor of their free BaseCamp program and its map installation utility MapInstall. I think MapSource is far easier to use for managing maps, but BaseCamp is better for managing tracks and waypoints, and is the only option for download BirdsEye imagery. However, MapInstall doesn’t let you save mapsets the same way MapSource did; every time you want to upload certain maps, you’ll have to select them manually.

The newer Garmin models do offer some major feature upgrades from older models in the way they handle maps:

1. Older models could only hold up to 2025 total map tiles; the new models can handle up to 4000 map tiles. This is, of course, not mentioned in the manual.

2. With older maps, there was a single map file generated that had to be called “gmapsupp.img”, otherwise the unit wouldn’t recognize it. And uploading a new set of maps erased the old set. If you upload maps to the newer Garmins, the same gmapsupp.img file is created. However, if you put the unit in mass storage mode and then rename the map file with a different name (but the same .img extension). the unit will still recognize it. This has some major advantages for map management. For example:

a. Upload all the topo maps for a state to your Garmin unit; the map file will be named gmapsupp.img.

b. Rename that gmapsupp.img file to something descriptive, e.g. az_24k.img.

You can now upload another mapset to the GPS without erasing the first one, something impossible on older Garmin units. You can also copy this map file from your GPS to your computer to archive it, and then delete it on your GPS unit to free up memory space. If you need these maps again,you don’t have to go through BaseCamp or MapSource to install it again– just copy the file back onto your GPS in mass storage mode,and the unit will automatically recognize it. This is an incredibly useful feature that is not mentioned in the manual.

3. Older Garmin units could only use microSD cards for storage up to 2 GB. Garmin says that the new limit is now 4 GB, but that’s a bit misleading. The maximum .img file size that can be created is 4 GB, but you can have multiple 4 GB .img files on a single card; people have reported using a 16 GB microSD card without problems. I’ve only used 2 GB, so I can’t confirm this. This is, of course, not mentioned in the manual.

4. Finally, thankfully, the new models use USB 2.0, up to 480 Mbps; older models used USB 1.1, painfully slow with large mapsets at 12 Mbps.

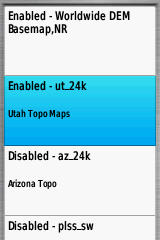
The map manager list is also somewhat improved from the older units; you now get full mapsets better defined, and easier to select:
742

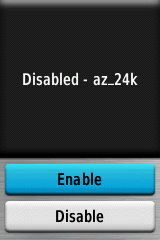
From this list, select a mapset to enable or disable it; this includes not just vector maps, but also BirdsEye imagery and Custom Maps. There is one serious annoyance with this process, though. If you select a mapset by scrolling and pressing enter, that doesn’t enable/disable it directly; instead, you get a screen asking you if you want to Enable/Disable that mapset:
751

Attention, Garmin – a mapset is either enabled or disabled; there are no other options. So why not just enable/disable mapsets by selecting them and pressing enter; why do you require people to go through an extra screen with Enable/Disable options?


So far, for the topics I’ve covered in parts one and two (hardware, interface, maps, GPS reception), there have been pluses and minuses to the 62s, but on balance, I’ve had a pretty positive view of the 62s; the only major exceptions have been the expensive price, pathetic manual/documentation, and unreasonable restrictions on Custom Maps. But in Part 3, I’ll look at the way the 62s handles waypoints and tracks, which is a huge disappointment. Plus, I’ll wrap things up with my conclusions and recommendations.

Still Looking For A Good Fieldwork Handheld GPS: A Review Of The Garmin 62s Part I

A little over a year ago, I posted my wish list of features for a GPS that would be useful for navigating and recording information for field work. A few months later, I reviewed the Garmin Oregon 450t, and while there were things I liked about it, overall I found it less than ideal for that purpose. About half-a-year ago, I posted on why I thought that Android represented  the future of handheld GPS units, over those with custom proprietary interfaces. Since then, I’ve been hoping that a rugged Android-based GPS would come out.

But late last year, I needed a rugged handheld GPS receiver capable of displaying aerial imagery and raster topographic maps. While my Android phone has that basic functionality I needed, it wasn’t rugged enough to handle the abuse it was likely to see,and no rugged Android GPS units had yet come out. I’d seen a number of reviews of the new Garmin 62 series of handheld GPS units, which supposedly address some of the shortcomings of models in the Colorado, Oregon, and Dakota series. I’ve been a Garmin fanboy for over 10 years now, love my Garmin 60Cx (same as the bestselling Garmin 60CSx minus the compass and altimeter), and am deeply immersed in the Garmin ecosystem. So, I decided to stick with Garmin and pick up a Garmin 62s, instead of switching to a model from deLorme or Magellan. Having had it for three months now,I’m now ready to pass judgment on it, both in comparison with my tried and trusted 60Cx, and with the potential I see in Android models.

Available Models

The Garmin 62 series currently comes in three different models. The fundamental GPS capabilities are the same on all three, but there are some distinctions:

Garmin 62 – $305 at Amazon.com – The base model; has 1.7 GB of built-in memory, which can’t be expanded. I dismissed this model because of the lack of memory expandability, but turns out that 1.7 GB is more than adequate for most applications, and I could have easily lived with it.

Garmin 62s – $390 at Amazon.com – Adds a digital magnetic compass, barometer, wireless ANT radio, also 1.7 GB of memory, and you can expand the memory capacity with microSD cards up to an additional 16 GB. This is the model I got.

Garmin 62st – $470 at Amazon.com – Like the 62s, but has the Garmin Topo 2008 mapset for the entire US installed (equivalent to 1:100K USGS topos); this leaves you with only 400 MB of free base memory, but you can expand that using microSD cards. I don’t recommend this model under any circumstances; you can get better topo maps for free from the GPS File Depot site, and upload only those that you plan to use. Even if you want the Garmin Topo 2008 maps, you can get them in DVD format for about $70, which makes the combined total for the 62s and topo mapset less than the 62st.

I have to say, the prices of high-end handheld GPS units are getting to be very unreasonable. For $400, you could buy two netbooks, one semi-decent laptop, or an Android tablet; what is is about these units that makes them that expensive, comparatively? In other areas of consumer electronics, prices have plunged dramatically over the years, while the feature set has expanded greatly; not so with Garmin’s GPS models.

Note: The Garmin 78 series has the same basic electronics as the 62 series, but is designed for marine use, so they float and have map options more appropriate for marine navigation.

Hardware

Basic unit

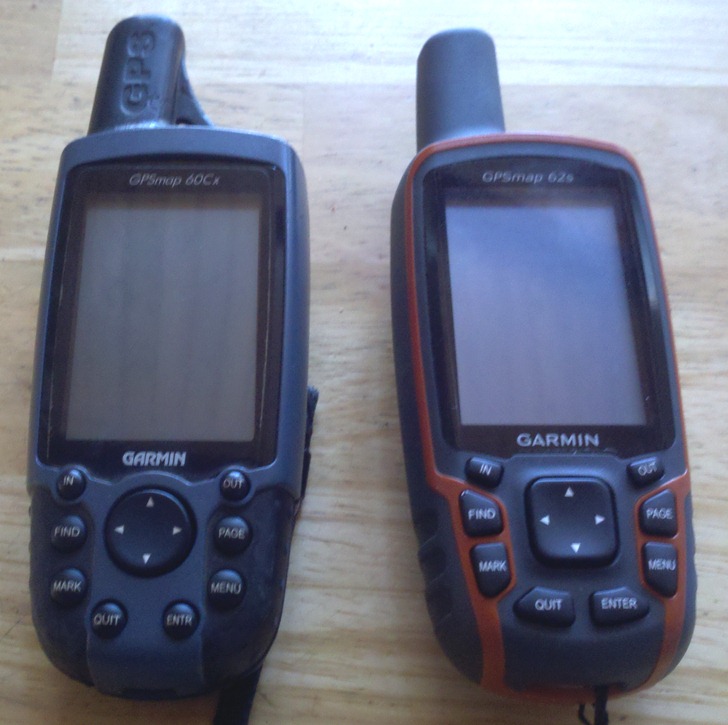
After 2.5 years of Garmin releasing model after model with touchscreen interfaces and patch antennas, with limited commercial and technical success, the 62s is a return to the classic front-panel pushbutton and helical antenna design made famous by the 60 series. In fact, from a distance you’d have a tough time telling them apart:

garmins

Left: Garmin 60Cx; Right: Garmin 62s

But if you hold them in your hand, you can quickly see and feel the differences, most of which are in the 62s’s favor:

  • The 62s is thicker in the upper part, but tapers down to thinner at the bottom, which makes it easier to hold.
  • The buttons and cursor pad have been enlarged and angled on the 62s, which makes them easier to identify by touch, and easier to use, especially the cursor pad.
  • Most of the 62s is covered by a rubberized coating, which makes your grip more secure, especially when wet. Both models are IPX7 water-resistant. One downside of this is that it moves the lanyard attachment loop to the bottom of the unit, less convenient than the side loop on the 60Cx.
  • 62s is about a half-ounce heavier than the 60Cx (8 oz with batteries vs. 7.5 oz), but that’s barely noticeable.

Overall, I’d call the 62s a big step up ergonomically from the 60Cx (which was pretty good to begin with). And I’m glad that Garmin finally realized that touchscreens aren’t always the best solution for everyone. Early units apparently had a “creaking” problem, where they would make noises when you pushed the on/off button; my model was apparently a later production run, as I didn’t hear that problem.

Screen display

One of the biggest problems I had with the Oregon 450t was screen visibility in sunlight; while not horrible, making out map details could be a chore, even with the high 240 x 400 pixel resolution screen. The 60Cx’s 160 x 240 256-color transflective screen had lower resolution and color depth, but you could actually use it outdoors, which is a good thing. I’m happy to say that the 62s’s 65K-color transflective 160 x 240  display is a huge improvement over the Oregon 450t. I’d go so far as to call it equal, maybe even slightly superior, to the screen on the 60Cx. As an added bonus, the LED backlight is much brighter on the 62s than the 60Cx (or Oregon 450t), which helps with visibility in shaded or dark conditions. Full props to Garmin.

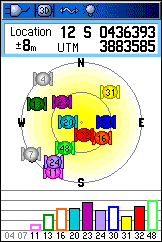
Having said that, though, Garmin’s use of the screen space and capability leaves something to be desired. For example, some Garmin mapsets support shaded terrain display on maps, and this is set as the default view. Looks great in a screenshot, but in daylight use it renders some maps virtually unreadable. Fortunately, you can turn this off, and I recommend that as one of your first things you do with a new unit. A bigger problem is that the 62s is running an OS originally designed for use on units with higher screen resolution, and usually a larger screen size as well. When it runs on the 62s, with a smaller screen and lower resolution, there can be issues. Text rendering, especially for small fonts, can show aliasing issues. And there’s a whole lot of extraneous detail on many screens that uses up valuable screen real estate. Compare these two satellite screens from the 60Cx and the 62s:

60cxsats
Garmin 60Cx
213
Garmin 62s

The first time I made this comparison, I had to pull out my ruler to check the screen sizes of the two; it almost seemed as though the 62s had a smaller screen. Turns out that they both have the same screen size, it’s just all that extra “box framing” on the 62s, which uses up so much screen space that they had to reduce the actual data display size; this problem crops up over and over again on the 62s. On the Oregon series, with a larger screen and higher pixel pitch, this isn’t an issue, but for models with smaller screens and lower resolutions, I think Garmin needs to customize the screen displays a bit better. I also have to say that I find the fonts on the 60Cx superior as well; they look better, and are more easily readable.

Battery life

Not quite as good on the 62s as the 60Cx, but still solid; I got 15-20 hours on hybrid NiMH rechargeables, about 3 hours less than on the 60Cx. The improved screen visibility helps with this, as you don’t need to use the backlight as often. The 62s comes with a “Battery Save” mode that supposedly turns the screen off after a few minutes while leaving the GPS receiver on; touching any key brings the screen back. I tried using this feature, but couldn’t get it to work for me.

GPS Reception

Overall, pretty good on the Garmin 62s, but my subjective opinion is that the 60Cx picks up more satellites more quickly, and in tougher conditions (e.g. indoors). WAAS performance on the 62s is a big step up from the Oregon 450t, but still isn’t perfect; both the 62s and Oregon use the same Cartesio chipset, and Garmin has been struggling for almost three years now to fix WAAS reception problems with that chipset. There are three WAAS satellites high in the sky where I live, and sometimes the 62s will cycle through signals from all three without locking in; other times, it will lock in immediately on a signal, and not drop it the way the Oregon 450t would. My 60Cx never has a problem getting a WAAS signal, even indoors; I find it difficult to understand why a newer model is so inferior in performance. Once a WAAS signal was acquired, the positions of both the 60Cx and 62s were identical to within a meter or two.

4/9/2011: After a week in the field, I’m far more disappointed and disgusted with WAAS on the 62s. I was out in an open area, no topography to speak of, and all three WAAS satellites fully visible, and more often than not the 62s couldn’t pick up a single WAAS satellite. That’s just pathetic.

Some people have noted issues with distance tracking at low speeds using the 62s’s built-in odometer; I tried to check that, but discovered that the odometer settings was frozen and couldn’t be reset. I am using the latest beta version of the firmware, so that might be responsible for this issue. Given that I’ve owned it for 3 months and only discovered this today, it tells you how often I use that feature; but if it’s important to you., you probably should check it immediately after buying the unit, and/or avoid beta firmware.

Compass

One thing I really did like on the Oregon 450t was the three-axis compass, and the 62s doesn’t disappoint on this score; these digital compasses on the newer Garmin models are the best I’ve ever used. I wasn’t terribly impressed with the performance or utility of the compass on the Garmin 60CSx, but the 62s compass has changed my mind. A digital compass lets you rotate the map to match the direction you’re pointing, or rotates the map location cursor to point in your direction when you’re standing still. Garmin’s new Sight N Go feature is also a terrific use of the compass; if you need to move in the same compass direction over a long distance, just point your GPS in the desired direction, push a button, and the Garmin will guide you to maintain that direction.

Wireless

The 62s and 62st come with built-in ANT low-power wireless capability; you can use it to send waypoints to another compatible unit, interface with heartbeat/cadence sensors, and receive signals from Garmin Chirp beacons. I didn’t experiment with this since I didn’t have any compatible equipment, but naturally I still have an opinion. I think having wireless is a good idea, but I have to wonder why Garmin chose the ANT standard instead of the more common Bluetooth standard. Bluetooth would have opened up the ability to wirelessly communicate position with computers and phones, which would have been incredibly useful.


Documentation

The 62s only comes with a quick start manual, no full guide. I understand this; paper manuals are expensive, and can’t be kept up to date the same way electronic documentation can. So I went to the Garmin website and downloaded the PDF of the latest manual. To call it bad is to praise it; it’s horrible, execrable, totally inadequate. These GPS handheld units do not have intuitive interfaces and obvious functionality; they absolutely need a full, complete manual that clearly documents all their features. The Garmin manual is hopelessly insufficient for that task; it barely covers the basic functionality adequately, much less the full feature set. This is a very expensive consumer hardware product, and for it to have only this lame excuse for a manual as the only official documentation is a disgrace. Garmin should first be ashamed of themselves, and then fix this problem.

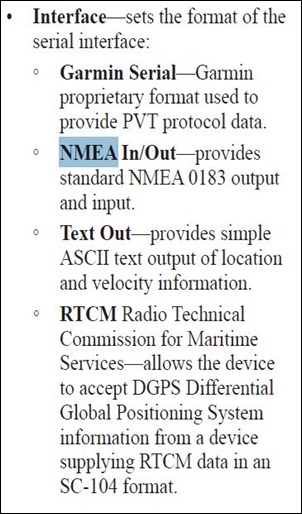
I’ll bring up several examples of critical/important features that aren’t in the manual further on, but let me just highlight one an egregious example that affected me. If you go to the section in the manual that talks about the USB computer interface, you get this:

nmea

Looks like this unit supports the serial NMEA interface for position data that many programs require, right? Except …

  • You need a special USB to DB9 cable, or a custom cable to hardwire a connection; that’s an extra $20. Not mentioned in the manual
  • You also need a serial port to hook the cable up to; most computers these days don’t have one, so you’ll need to buy a USB-to-serial adapter for an extra $30. Not mentioned.
  • If you set the Garmin to any of the interfaces listed above, and connect a USB cable, the unit will automatically go into Mass Storage mode; there’s no obvious way to keep the unit in standard GPS mode while externally powering it from a USB cable.
  • The manual doesn’t list or describe any option to transmit GPS position data from the unit to a computer, for use with compatible programs like Google Earth that take the Garmin USB connection format.
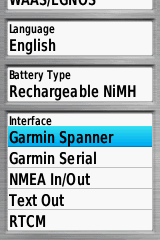
  • But if you go to the actual unit screen described by the manual, you discover an additional interface option not mentioned in the manual called Garmin Spanner…

951

Using this option lets you power the unit off a USB cable connection, and also transmits position information to a computer via the standard Garmin USB protocol. This isn’t mentioned anywhere in the manual!

  • Furthermore, Garmin has a program called Spanner, which converts the standard Garmin USB protocol to the serial NMEA protocol that many programs require; it even lets you split the signal into multiple virtual NMEA connections so that you can use it with multiple programs at the same time. I assume this is why Garmin labeled this connection as “Spanner”. The problem is, the Spanner software only works with Windows XP; Garmin has specifically stated that it will not update it to work with Vista or Windows 7. This is retarded!

Magellan did it right with the Triton series; if you set those units to NMEA and connected them to a computer with the USB cable, a virtual serial port was created through which the unit could send data to programs that require NMEA. Why Garmin couldn’t figure out how to do that, I have no idea.

While some might consider this an obscure technical detail,  there are dozens of important 62s features that get no mention at all in the manual (I’ll highlight a few later on). The only place I know of to learn of many of them is the Oregon Wiki site; while not all Oregon features have a counterpart in the 62s, many do, and this wiki does a good job at explaining many of them.

Tomorrow: The OS interface and maps on the 62s –  the good and the not-so-good.


Search And Catalog Your Local GeoData (ArcGIS Users Only)

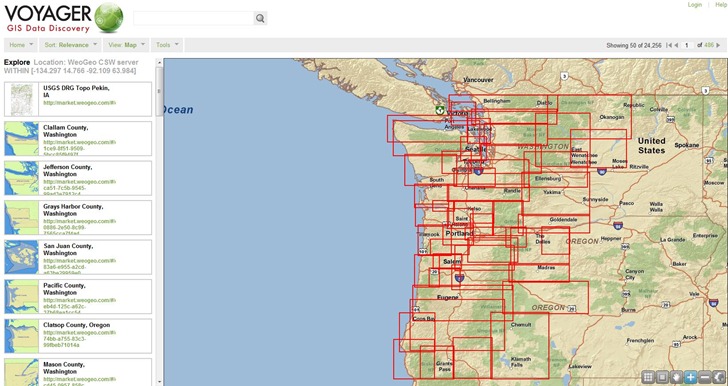
When I saw this post at the WeoGeo blog on Voyager, I was psyched. The free version of Voyager searches your hard drives for up to 5000 geodata files, catalogs/indexes them, thumbnails them, and makes them easily searchable and retrievable; paid versions increase that data limit, and offer more features (concurrent users, network storage searches, etc.). You can even add links to online data sources like WeoGeo that support the Web Catalog Service (CSW) (live web demo here).

voyager

I’ve got data files scattered all over the place, so this would be a perfect organization tool for me. But I was bummed to find out that you need to have ESRI’s ArcGIS Desktop 9.3 or higher installed on your system, which I don’t. Nuts. But if you do have a supported version of ArcGIS, you’d be crazy not to at least try out the free version.


Free Open GeoData Server Package (With Geocoding)

Via geothought comes word of the latest project from the developer of OpenHeatMap, Pete Warden. The Data Science Toolkit wraps up a number of open-source data tools into a combined server/data package that you can install as a VMware image or Amazon EC2 package (downloads/instructions included). You can also set it up as a stand-alone Linux-based server, or install it on a hosting service, with instructions available at the project’s github depository. Geo-related services include:

  • Geocoding: US address to latitude/longitude)
  • Coordinates to political areas: Enter coordinates, and get country/state/region/neighborhood data. For example, for (37.769456,-122.429128), you get:

(United States, usa, country) (California, us06, state) (San Francisco, 06_075, county) (San Francisco, 06_67000, city) (Eighth district, CA, 06_08, constituency) (Castro-Upper Market, Castro-Upper Market|San Francisco|CA, neighborhood)

  • Geodict: “pulls country, city and region names from unstructured English text, and returns their coordinates.” This one’s not working fully yet; sometimes gives results, other times nothing, even on the same query.
  • IP Address to Coordinates: Translates IPv4 numeric address to coordinates. Not always the coordinates directly associated with the website. For example, this site is based out of Arizona, but the server address for the hosting company is in Chicago, and used to be in Utah.

Also includes a built-in REST/JSON-based API for web services, so you can invoke it from other websites. Big advantage of this approach is that you can set up your own server for these data queries, free of the daily limits other similar services apply. You can test out the current services on the website.

Here’s a talk on this topic by Pete Warden from this year’s GigaOm Structure Big Data 2011 conference:

Watch live streaming video from gigaombigdata at livestream.com


Lookup EPSG Coordinate System Code From PRJ/WKT File

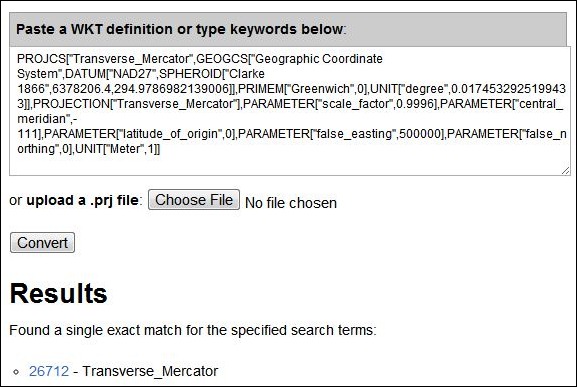
PRJ files are often included with GIS vector or raster data, and define the coordinate system associated with the data using the Well-Known Text (WKT) format. The Prj2EPSG utility site lets you upload or paste PRJ file data, and looks up the standard EPSG code designation associated with it (or gives you a list of what it thinks are the best matches). Utility seems to work well with many standard coordinate systems:

epsg1

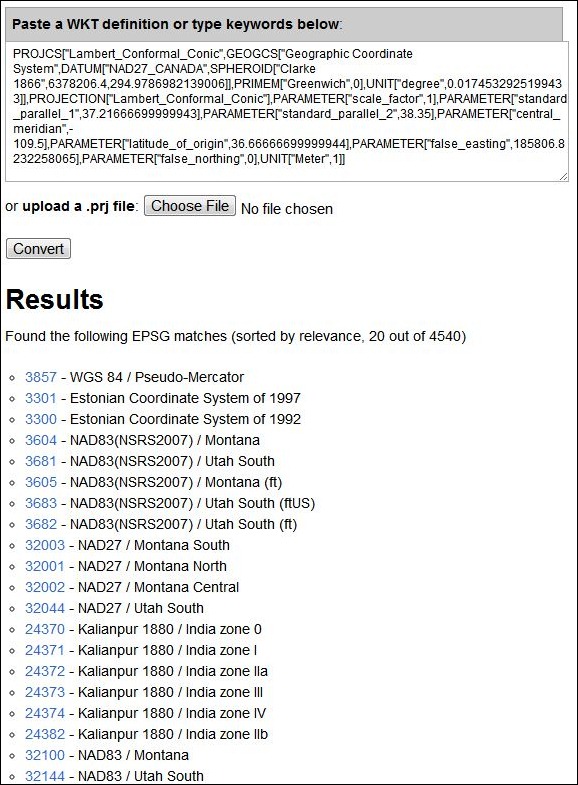
It’s not perfect, though. I threw an oddball Lambert Conformal Conic projection at it, from a USGS GeoPDF of a Utah 1:24K topo map, and it was a bit stumped:

epsg2

Estonia and India ;)? To be fair, this particular coordinate system gives a number of other programs heartburn as well, and it was the only outright failure in 10 sample files; the other 9 came up with one candidate answer, and it was always the correct one.


Cheap GeoPDF To GeoTiff Converter For Garmin Custom Map Imagery

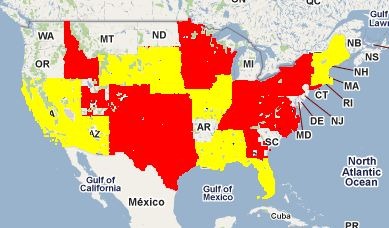
The USGS is well on its way to having updated all its 1:24,000 scale topographic maps (the classic 7.5-minute series) to digital format. As of today, the coverage map looks like this:

topos_done

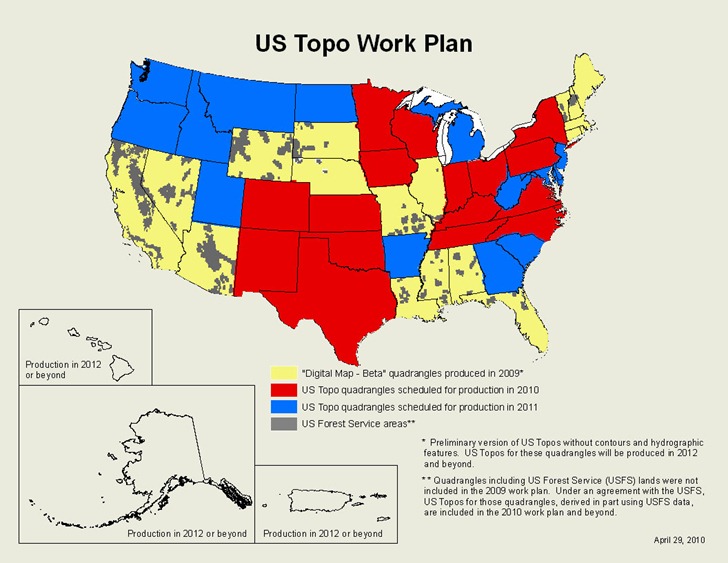
Areas covered in red are full topographic maps in in digital format; areas in yellow are “Digital Maps”, which have transportation features, boundaries, geographic names and aerial imagery, but no topographic contours or hydrographic features. According to the current schedule, most of the US will have either full topos or “Digital Maps” by the end of 2011, with Digital Maps scheduled for upgrade to full topographic maps starting in 2012:

work_plan

On one hand, the maps are very nice – they have multiple data layers, each with a separate kind of data, whose view can be turned on and off. Most data layers are vector, which means no more scaling/pixelization issues. On the other hand, the maps are currently only available in GeoPDF format, which limits their usability, particularly in GIS-related software. This was a conscious decision by the USGS:

The US Topo was not intended to be a GIS product. It was designed to serve users who need medium-scale topographic and orthoimage maps, but who are not GIS users.

US Topos are derived from GIS data. Almost all these data are from USGS and other government sources, and most are available for free through web services or file download sites. The US Topo represents a repackaging of these data, not new data creation. The primary design objective was to provide these data in a convenient and familiar form to people who need maps but who are not professional cartographers. The traditional 7.5-minute quadrangle layout and PDF format were selected as the best way to accomplish this objective; the GeoPDF extensions were adopted because they added some cartographic value at no cost to the end user.

Which is fine, but it still leaves some serious drawbacks with the format:

– As mentioned, not supported by most GIS programs, and I know that USGS topos are often used as the background base layer for maps. The USGS FAQ page mentions ArcGIS ($1500) and GlobalMapper ($350) as two options for converting GeoPDFs to GeoTiffs, but the price puts those out of reach of many.

– Printing the maps is a pain if you don’t have a large-format print, especially if you’re only interested in printing a subsection. The USGS Quickstart guide describes how to do it with Adobe Reader, and it’s not exactly a one-step process; what’s more, it’s virtually impossible to print to scale using their recommended procedure.

– Feature contrast isn’t always optimal, especially if you have the aerial imagery background turned on, and there’s no way to adjust that on a GeoPDF (unlike a GeoTiff).

– Newer Garmin GPS units support the Custom Map format, which lets you view custom raster imagery on the display screen; however, GeoPDFs aren’t in a raster imagery format that can be converted to this Custom Map format.

I’ve written a Garmin Custom Map utility called G-Raster, which converts GeoTiffs and other raster imagery types (KMZ overlays, MRSID, ECW, OziExplorer, graphics with worldfiles, BSB) into a Garmin-compatible Gustom Map format. Most features are free, but a few are unlocked with a $5 registration fee. The latest version (4.0) adds a new feature: a GeoPDF Tool GUI which can convert many (albeit not all) GeoPDFs into GeoTiff format. Interface is pretty bareboned – just specify the desired DPI of the final image, choose the GeoPDF filename, and a GeoTiff with the same name (but with “_gt” appended to the filename) will be created in the same directory as the original file:

tool_1

Also generated with the “listgeo” utility will be a “.gtf” file with that GeoTiff’s metadata; this file can be used to re-embed the metadata into a GeoTiff file that has been enhanced by a graphics editor that does not preserve geographic metadata.

For example

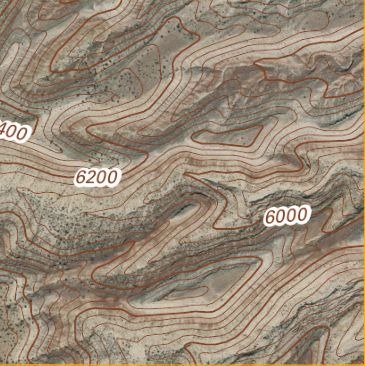
1.  I converted the Fruita, UT next-generation PDF into a GeoTiff:

plain

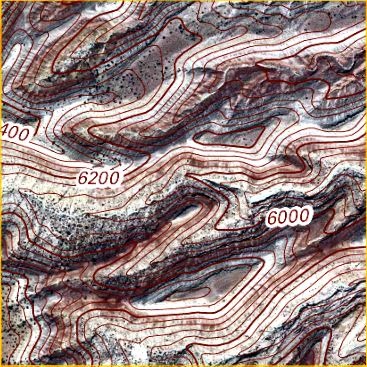
2. Garmin GPS units can have contrast issues when used in sunlight. So I loaded the GeoTiff into Photoshop to enhance contrast, and saved it under a different name; this process improved visibility, but also stripped out the geo metadata:

enhanced

3. I embedded the “.gtf” metadata back into the enhanced Tiff file using another tool included with G-Raster, and then converted it into a Garmin Custom Map (screenshot from my Garmin 62s):

140


Other features and limitations of the tool:

– The unregistered version limits you to a maximum size of 2000 x 2000 pixels; images larger than these limits will be cropped. Registering the program removes these limitations. This way, you can test the tool to make sure it works for you.

– Works fine with all next-generation USGS topo maps and Digital Maps in GeoPDF, as well as older maps in the UTM coordinate format. Some older GeoPDF topo maps that are in the Lambert Conformal Conic projection don’t reproject correctly; the GeoPDF Tool will identify those problematic files, to let you know they may not be correct.

– The USGS 1:24K input option in G-Raster will crop the collar of these next-gen topographic maps; another new option in G-Raster will let you export this collared topographic map in GeoTiff format (geographic projection, WGS84).

– Not all datums are currently supported; unrecognized datums are assumed to be WGS84. This is a good assumption for newer maps, a poor assumption for older ones. I do know that it does support NAD27 and NAD83 datums.

– There’s currently no way to turn off data layers in the GeoPDF when exporting it to GeoTiff format; all data layers are included. The help file includes a mildly-convoluted work-around hack that will let you create GeoPDFs with data layers turned off.

– Once in GeoTiff format, the next-gen topo maps can be opened in any compatible GIS program or graphics editor; you can then enhance/crop them, and easily print a smaller subsection. You can also print them to scale, or use poster printing to create maps larger than your printer’s maximum paper size.

More information about G-Raster, and a link where you can download it, can be found at the G-Raster web page.


Free Marine Navigation Software

Got an email the other day recommending a free marine navigation software package, which reminded me that I had a bunch of those bookmarked/archived for a future post. I’m landlocked at 6820 feet, and the only boating I do (rarely) is putting the inflatable canoe out onto a local lake or stream, so, I can’t really comment intelligently on the benefits/drawbacks of any of these. If you have any experience with any of these, feel free to post your opinion in the Comments section. Click on program title below to go to the website.

OpenCPN

OpenCPN is a free software (GPLv2) project to create a concise chartplotter and navigation software for use as an underway or planning tool.  OpenCPN is developed by a team of active sailors using real world conditions for program testing and refinement.

Open-source (GPL2); versions for Windows, Mac and Linux.

  • BSBv3 raster and S57 ENC chart support.
  • CM93 vector chart support.
  • IHO S52 compliant display of S57 vector charts.
  • Single-chart and Quilted display modes.
  • North-up, Course-up and Skewed-up display modes.
  • Moving-map display mode.
  • Route navigation with ship tracking functions.
  • Waypoint navigation.
  • Dashboard for configurable on-screen display of ship’s NMEA data.
  • NMEA 0183 GPS interface at selectable baud rate.
  • gpsd library support.
  • Autopilot output support.
  • AIS input with full target tracking and collision alerting.
  • Anchor watch/alarm functions.
  • GRIB file input and display for weather forecasting.
  • GPX Waypoint, Track and Route input and output file support.
  • Tide and Current prediction and display by location.
  • Multi-language support.

Extensive documentation at the website. Useful list of free supplementary software as well. GPS support requires an NMEA-capable GPS device (pretty much a given for all these programs.

HT to Pat for the link.


CapCode

Capcode is a free software suite for sailors that provides NMEA acquisition from all instruments of the boat, including GPS, Computation of the true wind, the polar of the speeds, the target speed, the laylines, etc., (and) displays (this information) on nautical charts (position of the boat, speeds vectors, polar, waypoints, grib weather information, etc).

  • Windows only; open-source (GPL).
  • Supports raster (BSB) and vector (S57) data
  • NMEA support (GPS, wind, depth, etc.)
  • GRIB (weather data)

Apparently many other functions as well, but online documentation is sparse. There’s a wiki, but not a lot of info there. Best source for current info, and new features, appears to be the blog.


SeaClear

SeaClear is a PC based chart plotter for Windows 2000/XP/Vista/7/NT/95/98/ME. With a GPS connected it displays the current position, speed, heading and other data on the screen. The chart is repositioned and new charts are loaded automatically as needed. Tracks may be saved to file for later reviewing and log book entries can be manually and automatically entered. Unlimited number of routes and waypoints can be created and used to assist the navigation. The screen area for charts is maximized with most functions accessed with the right mouse button. Zooming is provided with support for IntelliMouse wheel. SeaClear is created for nautical navigation but can probably be used for other navigation needs.

Windows only.

  • Most modern GPS units with PC communication will work.  Virtual serial ports, such as USB GPS units with serial drivers, are supported. Optionally other NMEA instruments may be connected. Depth, Compass and Wind is displayed if present. With AIS receiver connected targets are displayed on screen. On units capable of receiving NMEA waypoint and route data, uploading from the PC is supported.
  • SeaClear II uses raster charts and can use most BSB/KAP version 1 – 3 and GEO/NOS commercial charts. Encrypted charts, like BSB/CAP can not be used. Most common projections are supported. Chart datum’s are supported. You can add your own charts, scan or capture them, save as PNG, BMP or other common format. Skewed and rotated charts can be calibrated. Chart border can be set to reduce the actual chart area.
  • Unlimited number of routes are easily created. Maximum number of route points limited by memory only. Several routes may be joined.  Tracks can be imported. Cross track error alarm. Calculation of time to go, total time to go, bearings, steering indicator and output to NMEA.
  • Unlimited number of waypoint files can be created. Maximum number of waypoints limited by memory only. Multiple files can be merged. Quick locate of waypoint loads map and centers waypoint on screen.
  • Tracks are saved to file and plotted. Saved tracks can later be plotted and used to create routes.
  • Automatic and manual log book entries into a text file.
  • Import and export of routes, waypoints and tracks using G7ToWin and to G7T and Waypoint+ text file format. Export of waypoints and routes to supporting NMEA devices.
  • NMEA Depth, Wind, Compass and AIS. GPS based Log, Hours and estimated fuel consumption. Night modes with shaded charts.

Full documentation in English included with the program; links to manuals in other languages, and additional help resources, at the website.


OpenPilot

Included for completeness. Looks like an open-source project, but tough to say. Open-source; see the comments section for more info from the developer. Documentation is sparse/missing, and no binaries are available from the download site, only source code (compile-your-own). Screenshots show it running on a Linux system.


Quick “Hand-Annotated” Maps With Sketch-A-Map, Plus A Bonus Geocoder

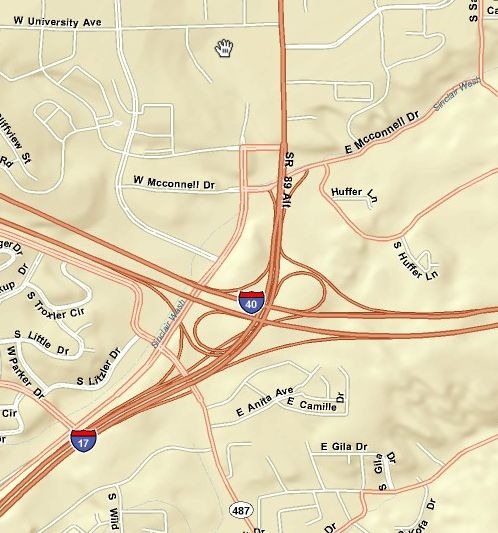
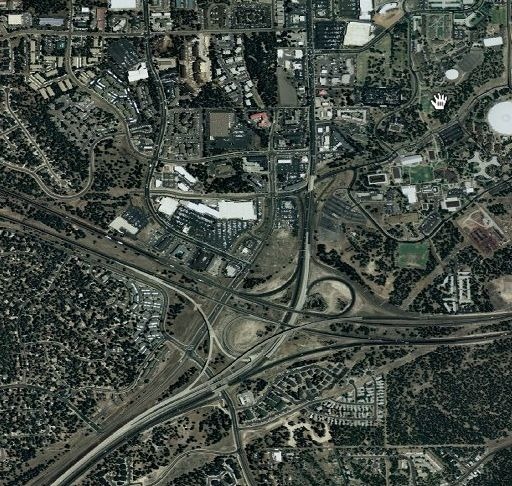
If you need to quickly bang out a “hand-annotated” map, you could do worse than ESRI’s Sketch-A-Map site. You have the choice of three different map backgrounds to draw on:

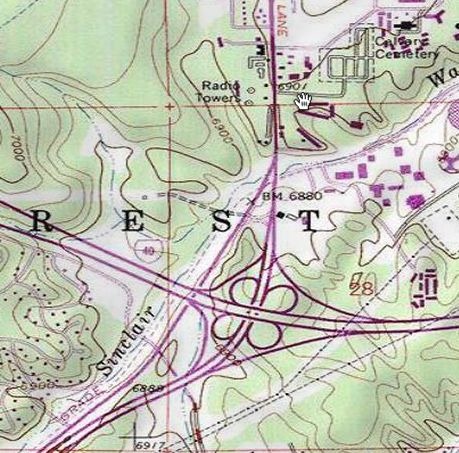
  • USGS topographic maps, with the scale type (1:24K, 1:100K, or 1:250K) determined by your zoom level

topo

  • Standard street maps (with some terrain shading)

street

  • Satellite maps / aerial imagery

aerial

All three images above are at the highest zoom level available, so don’t expect to do house-by-house annotations.

You can zoom in to an area with pan/zoom, or use the “Locate” tool to specify latitude/longitude or address to go immediately to that location. Once there, select your desired drawing tool from the Toolbox:

toolbox

And annotate your map:

map

The “Trash Can” icon wipes the map clean of all annotations; unfortunately, there doesn’t seem to be a way to remove a single added object, not even the most recently-added one. So think of this as drawing in pen on a paper map, where you just have to deal with any mistakes you’ve made or start over completely.

Once done, you can use the “Drawing” menu to select “Print or Save”; this gives you the option of either directly printing the map, or saving it in PNG format. Images are saved at the same pixel dimensions they have in your browser window, which will depend on your display monitor, and whether the browser fits the full screen.

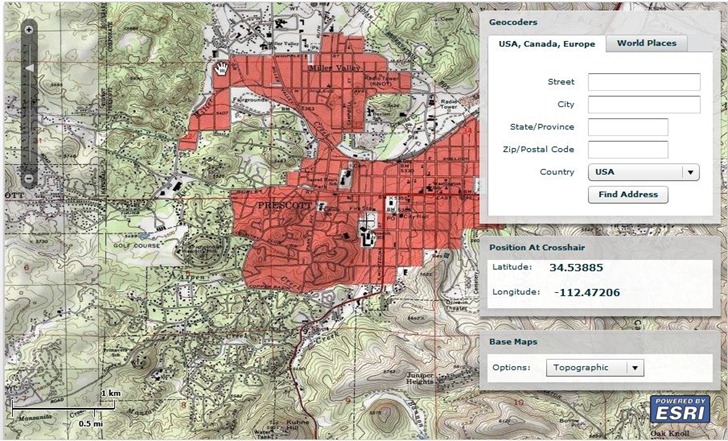
The same ESRI site offers a basic geocoder, which lets you pull latitude/longitude coordinates up by address, or the center spot on a map:

geocoder

Via Very Spatial.