Printing some maps on a standard 8.5″x11″ sheet of paper doesn’t make a lot of sense; the scale can be so small that you might not be able to make out any details at all. But even medium-format printers (capable of 13″x19″ paper sizes) are expensive, starting at about $300; large-format printers capable of handling paper in widths of 24″ or greater can easily run over $2000. Print services can be expensive as well, with a single large map costing anywhere from $25 to $100 to print. But there is a way to make printed maps larger than the largest paper size supported by your printer: break the map image up into smaller sections which are printed onto individual pages, trim off the edges, then assemble all the pages together into a larger map. This is sometimes referred to as “poster printing”.
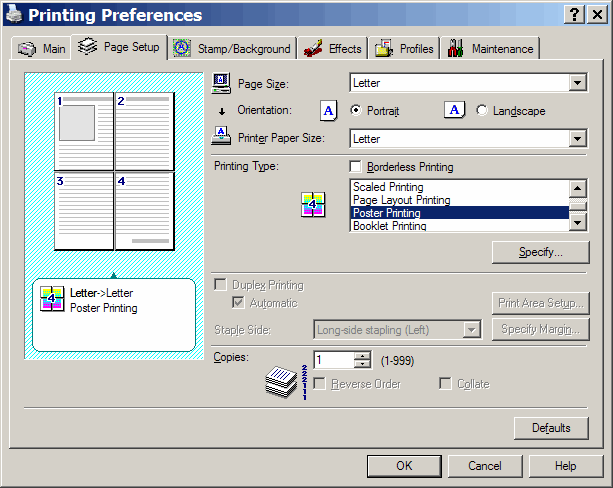
There are several free ways to do this. First, some printers support poster printing; check the Preferences section of your printer driver to find out. Here’s an example of that for my Canon iP3000 printer:

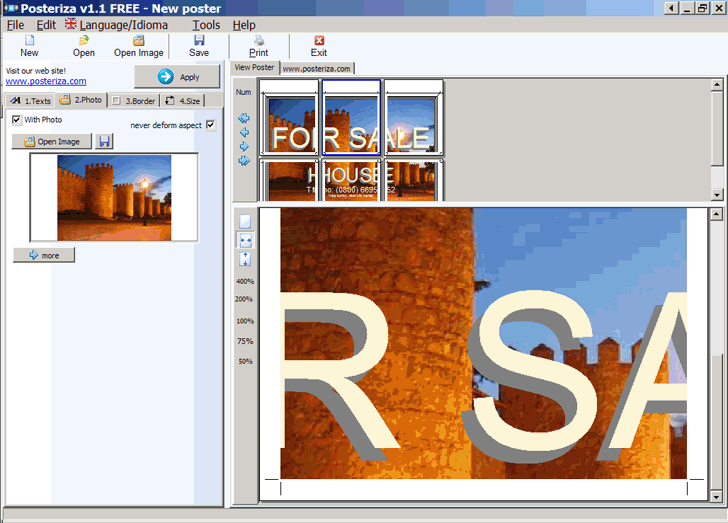
There’s a free Windows program called Posteriza that will chop an graphic file like a map into smaller segments, and then print each segment on a single sheet of paper. This program offers more control than the typical print driver – you can crop the original image, see a preview of how the original picture will be segmented, and add both text and graphics to the poster image as well. And you can save the settings in a file for future use:

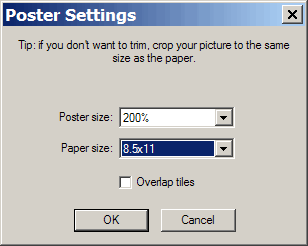
Finally, the excellent free image organizer and editor Picasa has the ability to chop up a graphic into segments that can then be printed as individual pages and re-assembled as a poster. Select the image, then choose Create => Make a Poster from the menu:

You’ll only have the choice of two paper sizes, 4×6 and 8.5×11. And you can only specify the percentage of enlargement for the original, with no preview. But Picasa gives you an option the previous two methods don’t: to have the printed image segments overlap each other slightly (by checking the “Overlap tiles” box). This will give make trimming the images less critical, since with some overlap you can make a small cutting error and not lose any part of the final map. After you click on OK, Picasa will create the image segments and put them into the same folder as the original image; you’ll still have to select and print them manually.
Picasa has another geographically-related use: you can Geotag your pictures using Picasa and Google Earth, view them in Google Earth at the tagged location, or export them to a Google Earth KML file. See the tutorial at Ogle Earth for step-by-step instructions.
There is another way to do poster printing with one additional useful feature: the ability to set the scale for the printed map. I’ll cover this in a future post.
You might also want to put http://mapagigante.com/ in your list. It uses google earth to make a huge map which you can then use to print as a poster.
Thanks for the link to MapaGigante. But I have serious doubts that this use of Google Maps imagery falls under the provisions of “fair use”, and I tend to define “fair use” fairly liberally.
Actually – Mapagigante just uses the APIs like they’re designed to be used.
Some folks had made programs that “rip” the data off of the grid servers, but mapagigante just makes it easy to make a big Google Map in your browser. It’s actually astounding how big a picture your browser can make. I’ve made maps that were around 500 megapixels.
Give it a try!