Many smartphones come with geotagging turned on as a default; if the phone has a good position fix from GPS or cell tower data, it will embed these coordinates into the EXIF header of the photograph.This is my preferred setting, but there are times when I want to remove this data, to protect the location where a photo was take. The free Windows program Geotag Security will remove the embedded coordinate geotagging data from all photos in a folder, while leaving the other EXIF data (date, time, exposure info, camera, focal length, etc.) untouched. Just select the folder with the photos you want to have scrubbed, and it does the job automatically:

As the caution above indicates, once the coordinate geotags are removed, they’re gone for good. So if you want to preserve the original geotagging data somewhere, you should first make a copy of the folder with your photos, and scrub the geotag data only out of the copy.
A $20 Pro version of Geotag Security is available that will monitor folders, and automatically scrub their geotagging data as you download them from your phone or camera.
Via Lifehacker.
Note: The Android app GeoEraser can also remove geotag data from a photo, but creates a new scrubbed photo, keeping the original unchanged.
Mike Lee’s QRStamper program will losslessly embed a QR code with the coordinate data for a geotagged photo into a copy of the photo. Just drag and drop the photo onto the program icon, and in the same directory as the original, QRStamper will create a copy of the photo with the QR code embedded at lower right:

Scan the QR code with an app like Android’s Barcode Scanner, and retrieve the geotagging coordinates:

The similar GeoStamper program embeds a standard geotagging icon losslessly into a photo copy, to indicate it’s geotagged:

His GPStamper program, covered here a long time ago, which losslessly embedded actual coordinate/location data into a photo, is no longer free. However, it still has a 30-day free trial, and “non-commercial scientific research or survey use is eligible for a free licensed version.”
Adobe has released a free plug-in for applications in their Creative Suite 5 (CS5) (e.g. Photoshop, Illustrator) that adds a “GPS” tab to the info window:

It doesn’t do a lot, just display an image’s embedded geotagging information in it, but it’s better than nothing. Available for both Windows and Mac.
From DPreview, via OgleEarth.
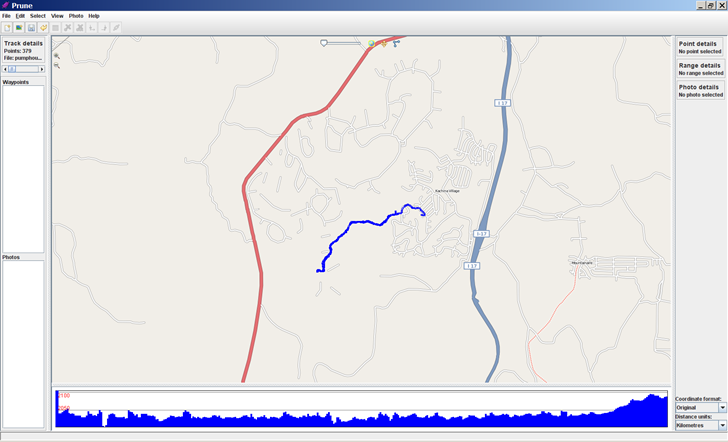
Been a while since I last posted about Prune (version 6) (earlier posts about versions three and four), a GPS data manager, visualizer and photo geotagger. It’s Java-based, so it runs in Windows, Mac and Linux, not a common trait with GPS software. Just checked the website, and discoverd that Prune is at version 10 (!), and has progressively added features with every version. Current feature set (from the website) includes:
- Loading of coordinate data from file in any text-based format, with any combination of fields and any separator, or in GPX or KML or KMZ or NMEA format. Xml files can be zipped or gzipped.
- Loading of coordinate data from GPS receivers using gpsbabel.
- Top-down, zoomable, draggable view of data points including map images from Openstreetmap or any similar map tile server (eg opencyclemap, openpistemap).
- Caching of map tiles to disk for faster access and offline use.
- Altitude profile view or speed profile view.
- Selection of individual points and ranges to show details.
- Deletion of duplicates and variable compression of track.
- Deletion of selected points and ranges, and reversal of ranges.
- Editing of point data, and creation of waypoints.
- Re-ordering of waypoints within data set.
- Saving of data in specified text format, XML format (GPX, KML, KMZ) or sending to GPS receiver.
- Interactive 3d display of data.
- Export to POV format for rendering of 3d model by Povray.
- Loading of photos in jpeg format with or without coordinate data in exif tags.
- Connection of photos to points, and saving of coordinates in exif tags. (requires exiftool)
- Automatic correlation of photos with track points using each photo’s timestamp.
- Inclusion of photo thumbnails in KMZ export.
- Generation of charts (eg altitudes, speeds) either on screen or exported to SVG file.
- Launch of browser showing area in various map websites such as Google Maps or Openstreetmap.
- Multiple Undo.
- Multiple language support – currently EN (English), DE (German), DE_ch (Swiss German), ES (Spanish), FR (French), IT (Italian), PL (Polish), ZH (simplified Chinese), JA (Japanese) and Portuguese (PT) are supported. Turkish (TR), Romanian (RO), Indonesian (ID) and Afrikaans (AF) are partially supported.
Screenshot (with 3D track window open):

You’ll need to have Java installed on your system just to run the program. But full functionality requires download and installation of a number of needed software packages, as described on the “Dependencies” page; all are free and available for all OS platforms.
There are a number of stand-alone Windows apps and web apps that led you geotag photos by matching the time they were taken with points on a GPS track (see the geotagging category of this blog for examples). But all of them require you to start up the program, load in the photos, load in the GPS track, and then start up the geotagging process. Flip Fahrenfort geotags a lot of his photos, and got tired of the multiple steps involved. So he wrote GeoHarvest, a program that automates the process to a large degree for owners of Oregon Garmin GPS units. When a memory card or camera is attached to your computer, it can automatically download a copy of digital photos from a memory card/camera to a folder of your choice, and keeps track of the photo filenames. When you connect a GPS, it will download track data and save it in GPX format. It then matches up the track times with the times the photos were taken, and geotags the photos with the appropriate coordinates.
The program can run continuously on your system, monitoring for all inserted memory cards or attached cameras with images to download, or GPS units with tracks to download as well. But if you want it to run this way, you’ll have to copy a shortcut to the program to your Startup folder manually, since the program doesn’t come with an install program that does that. It also can run in single-transfer mode, so that you can connect the data sources, have the photos geotagged automatically, then have the program terminate.
Unfortunately, since I don’t own a Garmin Oregon unit, I was unable to figure out how well it works with that unit. And while the program option suggest that you should be able to get the program to work with other GPS models with some manual work, I was repeatedly unsuccessful at this – GeoHarvest refused to accept GPX files generated by multiple programs. There are online help pages on program configuration and usage; if you can get it to work with your non-Oregon GPS, please leave a comment below.
I’ve covered a fair number of stand-alone geotagging apps before; check the geotagging category on this blog for some examples. But if you don’t have a geotagging application on the computer you’re using, GeoImgr is a web-based app that can geotag photos with a simple Google-Maps-based interface. First, upload a single picture (no batch uploading, unfortunately). GeoImgr lets you upload the image at its full original resolution, so this can take a few seconds. Once uploaded, a thumbnail of the uploaded photo will appear at upper right:

Then position the marker in the Google Maps interface at the location where the photo was taken. Click and drag to move the map, zoom in by clicking the plus button or double-clicking on the map, and position the marker with a single click:

The position of the marker will be continuously updated at right; click on “tag photo!”, and those marker coordinates will be embedded in the photo’s header. When you click “download photo!”, the geotagged photo will be downloaded with its original filename intact, and the image data unmodified.
Not a substitute for a good stand-alone app, but does the job, easy to use, and always available online.
HT to Michael Kempf (creator of the site).
Updates to report on several photo geotagging applications covered previously on this blog:
Grazer: Grazer is a very simple and easy to use geotagging program. However, the first time I looked at it, it had difficulty matching up the times in my GPX track with the times in my photos, even though other applications had no such issues. Supposedly those problems have been fixed, and the program modified to run in Vista, and a quick test confirmed that. The feature set is a bit thin, but that also means there are fewer options to confuse you with. Still not my top choice, but now that it actually does work, it might be worth a look for someone looking for a very simple geotagging app. Windows only.
Prune: Version 7 of Prune is out, with a slew of new features:
- Loading of KMZ files and zipped GPX
- Improved compression functions with four configurable algorithms
- New function to call gpsbabel to send data directly to GPS receiver
- Charting functions (eg altitude or speed against distance) using gnuplot
- Map view can now use other OpenStreetMap images such as OpenCycleMap, OpenPisteMap or any other tile server
- New function to create an average position from a track section
- Display of straight line distances between waypoints
Since it’s a Java application, it should run on any platform that supports Java, including Mac OS X and Linux. Note: You will need to download EXIFTool to geotag photos. You will also need to both “Correlate” photos, then explicitly tell the program to “Save to EXIF” to embed the geotagging data; just correlating alone doesn’t save the geotagging data.
GeoSetter: My favorite free geotagging application (Windows only); bit of a learning curve, but it’s worth it. Since my first post on it over a year ago, lots of improvements and bug fixes; most recently, the latest version of EXIFTool was added.
The Java-based GPS and geotagging application Prune, covered in earlier posts, has been updated to version 6.0. New features include:
- Map view using OpenStreetMap images is now integrated in the main window, with control for map transparency; you can open up an OSM map or Google Map for the track location in a browser as well
(You may have to turn off the firewall in Windows to get this to work)
- Pov export has a new option to use sphere sweeps for better appearance
- New function to check online for a newer version of Prune
- New function to take a section of track and cut/paste it to another position
- New function to add or subtract a time offset from point timestamps to correct for time shifts between a GPS track and camera time
- New function to call gpsbabel to load data directly from GPS receiver
- Additional file filter options on load and save
- Italian language support
Full support for all its features requires downloading of the Java3D library, exiftool, and GPSBabel.