There are a fair number of programs that not only embed geographic data from a GPS file into a photo’s EXIF header, but also have a host of other features as well. While I’ll be posting about some of those shortly, I thought I’d start out with two more modest programs that don’t do much more than geotag the photos.
More after the fold …
Grazer: Grazer is the simplest program I’ve found – all it does (purportedly) is embed the geographic data from a GPX file into a photo based on timestamp. Start up the program:
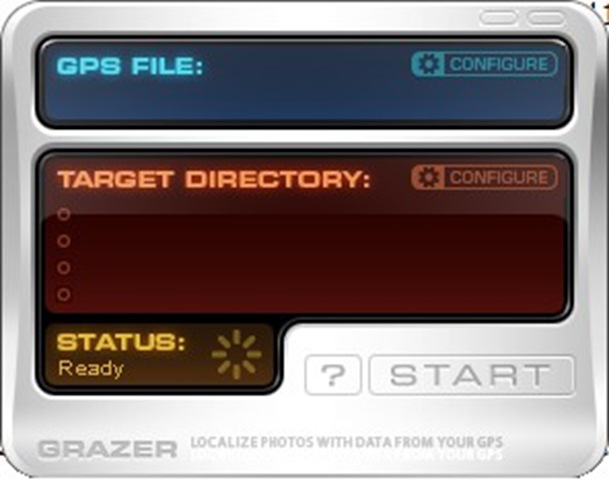
Click on the blue “Configure” at top to select a single GPX file that contains position and time data for the photos you want to tag. Then click on the red “Configure” underneath:
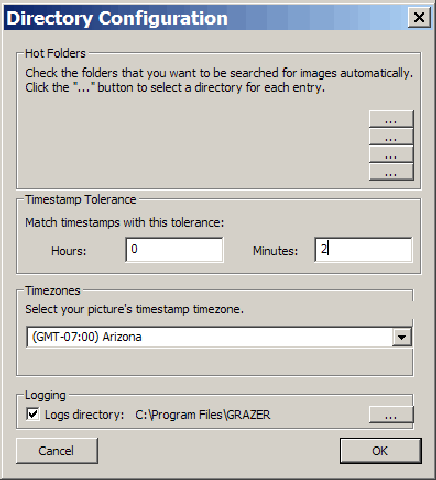
Here you select the directory (or directories) that contain the photos you want to geotag, the time tolerance (how closely the photo’s timestamp needs to match up with the GPS location’s timestamp), and the offset between the camera’s timezone and GMT (UTC), the timezone used by the GPS to timestamp locations in the GPX file.
I’d like to report on how well the program works, but I can’t – it was unable to timestamp my photos taken in the Arizona timezone, even when the timezone offset was specified in the configuration window (-7h from GMT). I suspect that the program isn’t correcting properly for the timezone difference. If you have the same problem, you could probably work around it by setting your camera’s time and date to GMT, to match the GPS’s native timezone. But you don’t have to – the next program does a far better job than Grazer on matching timezones, and does a lot more.
PhotoMapper: PhotoMapper has more features, and a lot more flexibility, than Grazer, but that’s OK, because it has a simple and intuitive interface. First off, you don’t have to select an entire directory of pictures; you can choose one, some, or all the pictures in a single directory to geotag using the File => Import images command. PhotoMapper loads in the image data, and puts it into a scrollable list that shows the name, date and time the photo was taken. If you have pictures in more than one directory, that’s not a problem – just open them with the File => Import images command, and they’ll be appended to the other photos in the list. If the photo was geotagged earlier, it also shows that information in the Lat/Lon list columns. Open up the GPX file with the GPS info using the File => Import GPS data command (also supports NMEA and Training Center History format files), and PhotoMapper automatically figures out the best match between the photo times and the GPX times, and puts that geographic position into the photo list in red:
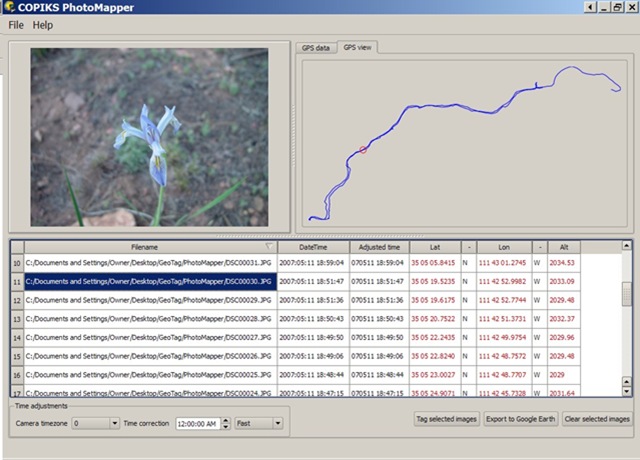
Click on a photo in the list, and a thumbnail displays at upper left. In the upper-right-hand corner, clicking on the “GPS view” tab displays the GPS track graphically, with a red circle marking the position of the selected photo. The “GPS data” tab shows the start and end time for the track, and the central geographic position of the track.
If you’re not getting a position match between the GPX track and the photos, it could be because the program can’t match up the GPS and photo times because of a timezone offset, or because the camera’s time was set incorrectly. PhotoMapper lets you adjust for either of those easily using the “Time adjustments” setting at the bottom of the screen. You can either shift by a full timezone, or correct for an error in the camera’s time setting (minutes or hours). The adjusted time will be displayed in the photo table, and the position will be changed to reflect the time change as well.
Another nice feature about PhotoMapper is that it doesn’t automatically embed the geotag in the photo during this process. Once everything is set the way you want it, you select the photos you want to geotag from the list, then click on the “Tag selected images” button at the lower right; only then is the geotagging data written to the photo header. You can also manually edit the geographic location by double-clicking on a latitude or longitude in the table, then modifying it. If you have a set of photos for which you know the location, but don’t have a GPX file, you can geotag them manually by entering the latitude and longitude for the photos this way, and clicking on the “Tag selected images” button.
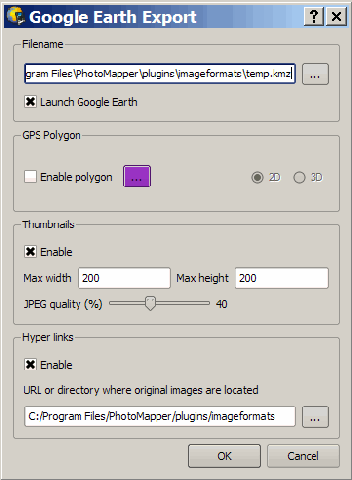
Finally, you can select images from the list (before or after embedding the geographic location into the header), and convert them into a Google Earth KMZ file, with the photos shown as thumbnails in pop-up balloons:
geotagged images in Google Earth
You can display just photo placemarks in GE, or by checking the “Enable polygon” button you can display the GPS track as a line. You can also set the maximum size and quality setting for the thumbnails, a nice touch that other similar programs don’t include. And you can link the photos to a local or Internet directory instead of embedding them in the KMZ file.
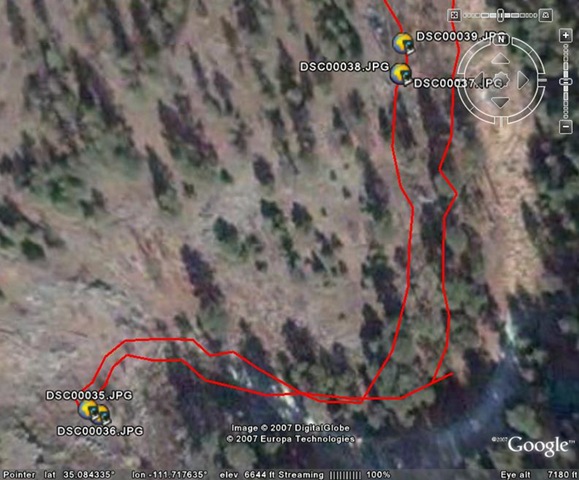
It does take a while for the photos to be re-sized into thumbnails, so be prepared to wait.
One big drawback – Picasa doesn’t recognize the geotagging done by PhotoMapper. This is almost certainly a Picasa issue, since some other geotagging programs seem to have the same problem in Picasa as well. Hopefully this will get fixed soon by Google. Added 7/14: This is a common problem with many programs, since there seem to be issues with inconsistent standards for the GPS data in EXIF headers; hopefully, this will be fixed someday. A closer examination of the tags created by PhotoMapper suggests that they aren’t a standard GPS tag, which makes the program less than ideal for geotagging photos for general use.
PhotoMapper is free and Open Source under the GPL (though they do ask for a donation).

Sorry, it’s not really clear what you’re writing. On one side you’re telling that there are inconsistent standards for GPS Data in EXIF headers on the other side you write that the tags written by Photomapper aren’t a standard GPS tag.
If there is an inconsistency in the standard than nothing conforms to the standard because there exists no standard … therefore Photomapper by definition cannot write correct tags.
Did you report the problem to the authors of Photomapper?
Yes, it’s not very clear; it might be better to say that there are standards, but they change, and there may be different ways to implement them that cause issues with compatibility. It wouldn’t be the first time that’s happened with a file format. Part of my confusion also comes from a program I’ll be writing up shortly that creates geotags that Picasa won’t recognize; but if you modify the EXIF header slightly, Picasa can recognize them. I thought that was the case with PhotoMapper, but I was wrong – modifying the EXIF header didn’t make photos tagged with PhotoMapper show up properly in Picasa. I also discovered that several other programs also don’t properly pick up geotags embedded by PhotoMapper (Irfan View, Opanda IExif). A brief look at the PhotoMapper online help files seems to indicate that they’re writing the right tags, but there’s no info about why other programs might have difficulties recognizing those tags. I have sent an email to the authors of PhotoMapper asking them about this, and I’ll post a followup here when I hear from them.
Now it’s clearer. Thanks for your explanation. I also wrote a mail to them but till now they didn’t answer …
Do you know locr? locr offers the ideal solution and makes geotagging exceptionally easy. locr uses GoogleMaps with detailed maps and high-resolution satellite images. To geotag your photos just enter address, let locr search, fine-tune the marker, accept position, and done! If you donâ??t know the exact address simply use drag&drop to set the position.
Have a look at http://www.locr.com.
Yes, locr gets covered later in this series.
I use GPSed.com service for recording GPS tracks just from mobile and storing them in online archive. They offer simple and free photo-geotagging Windows-based software: GPSed Photo Take’n’Pin (http://photo.gpsed.com). In one click geotagged photos will be opened in Google Earth, in precise places they were taken at. I recommend everyone to try it out.
I found that Grazer seem to have the timezone settings backwards. Instead of using -5:00 for EST I had to use +5:00. Then it matched everything up fine. The phototags work great with Picasa and Google Earth.
A simple web-tool for geotagging images is GeoImgr (http://www.geoimgr.com).