As you might guess from the name, MicroDEM is a program that works with digital elevation models (DEMs), plots of elevation as a function of position, the same kind of data used by 3DEM. But MicroDEM contains far more features and capabilities than 3DEM, and includes other non-DEM related features as well. I like to think of MicroDEM as a “Swiss army knife”, since it contains so many interesting and useful tools. Even if you’re not into GIS, MicroDEM is worth looking at for its terrain visualization and analysis capabilities. I could post for month or two on just MicroDEM alone, and by the time I’m done, the posts will likely add up to at least a month’s worth. But to start, I will do a number of posts over the next week or so on just a little of what MicroDEM can do. Bear with me on the first few – I have to get through some of the basics of program installation and operation before I can get to the really cool stuff.
MicroDEM was created, and is still maintained and constantly upgraded, by Peter Guth, professor of Oceanography at the US Naval Academy. The history of the program stretches back over twenty years, as documented in the extensive and very comprehensive help file. The program can be downloaded from the “Download” link on the home page. The main install program is updated every month or so, while new releases of both the executable and help file (with bug fixes and new features) come out somewhat more frequently, usually several times a week; just copy the latter two into the program file directory to update it. This is probably worth doing about once every two weeks or so. It’s stated that the current version is always an alpha, but it’s more like a beta where most things work, but some functions have occasional quirks and bugs. The current installer runs on Windows XP and Vista, but I’ve also successfully installed and run the program in Ubuntu Linux using the WINE emulator (with minor issues).
Once you have downloaded and installed the program, you can open a DEM using either File => Open DEM, or clicking on the Open DEM button on the toolbar at the top. While you can always use a DEM from the USGS Seamless Server, a sample DEM comes with the program in the mapdata/DEMs folder, HangRockCanyon_DEM_2.tar.gz (MicroDEM handles the unzipping automatically):
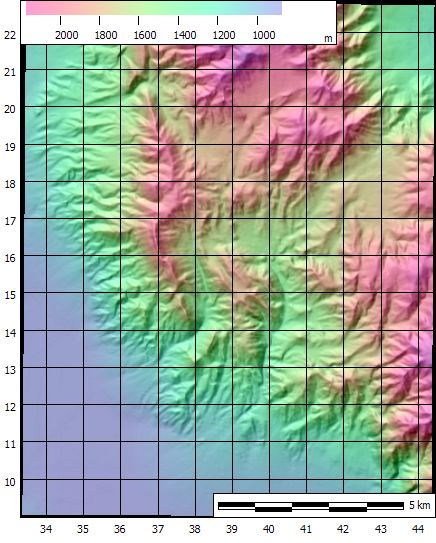
The default display for a DEM is to show it as “reflectance”, i.e. creating a virtual terrain surface, then illuminating it from an angle to create shading; in this case, it’s colored as well. The initial size of the display window in pixels on your screen can be changed by going to the Maps tab in Options, and changing the default size; many other program defaults can be set there as well as during program operation.
For example, there are several defaults for the grid and map marginalia, and I’m going to change those defaults by program operation. Right-clicking on the image, and selecting “Grid”, brings up this window:
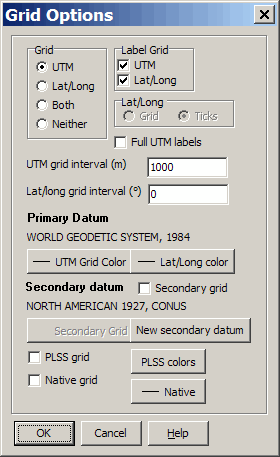
This window controls the type of grid overlaid on the image (UTM or geographic), the color, spacing, and also lets you plot a grid for a different datum. MicroDEM can open regular map image files, so you could use this feature to overlay a grid on top of a map that doesn’t have one. In this case, I’m going to turn the grid off by selecting “Neither” at the upper left:
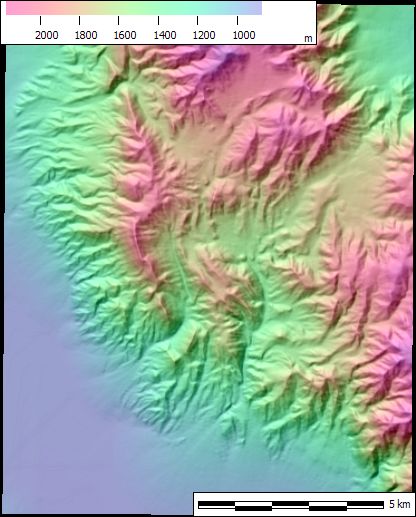
I’d also like to get rid of the scalebar at the bottom as well. Right-click on the image, and choose Legends/Marginalia:
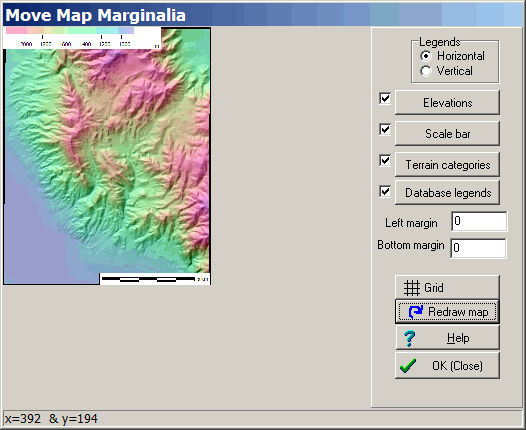
Here you can remove the scalebar, terrain categories legend, elevations legend, and other data by unchecking the appropriate box, then clicking “Redraw Map”; you can also change the legend orientation and grid settings as well. Unchecking the box next to Scale bar, redrawing the map and then closing this window leaves the terrain map like this:
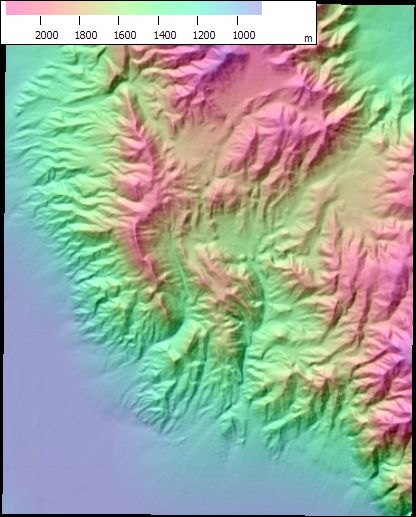
The next time you open a DEM, it will look similar to the above, i.e. you won’t see either a grid or a scalebar as there was the first time the DEM above was opened.
At the top of the terrain map window is a toolbar with many buttons on it; I’ll just cover some of the basic ones for now. The commands are also available from menus at the top as well.
![]() Subset and zoom – Click on this, then click and drag in the map window over an area you want to zoom in on:
Subset and zoom – Click on this, then click and drag in the map window over an area you want to zoom in on:

 Undo subset – Undoes the subset operation above.
 Zooms out to show all the loaded data.

 Enlarges/shrinks the image by an inputted factor (e.g. if you enter 2, it doubles the on-screen image size).
![]() Enlarges 1 to 1, so that one pixel in the image corresponds to one image on the screen. Anytime you save images in MicroDEM, it saves them at the screen resolution, not the original image resolution. So if you want to save the image at its full original resolution, you need to zoom the image to at least one to one before saving it, but you can overzoom to oversample the image as well (make it larger than the original). You can save the image as either a plain image with no georeferencing data (File => Save Image), georeferenced with a world file (File => Save map as image => With world file), or as a GeoTiff with the georeferencing information embedded (File => Save map as image => As GEOTIFF, screen scale). In the last case, it saves it in the program’s native datum, which has to be either the default WGS84 or the optional NAD83.
Enlarges 1 to 1, so that one pixel in the image corresponds to one image on the screen. Anytime you save images in MicroDEM, it saves them at the screen resolution, not the original image resolution. So if you want to save the image at its full original resolution, you need to zoom the image to at least one to one before saving it, but you can overzoom to oversample the image as well (make it larger than the original). You can save the image as either a plain image with no georeferencing data (File => Save Image), georeferenced with a world file (File => Save map as image => With world file), or as a GeoTiff with the georeferencing information embedded (File => Save map as image => As GEOTIFF, screen scale). In the last case, it saves it in the program’s native datum, which has to be either the default WGS84 or the optional NAD83.
That’s it for the basics; tomorrow’s post will deal with how to change the reflectance display parameters.
Peter Guth’s website is no more active. From where else I can get the MicroDEM?
Checked the link, and the MicroDEM website is accessible for me.