blankblank blank


Archive for the 'Google Maps' Category Page 9 of 15


Photo GeoTagging IV – GPicSync

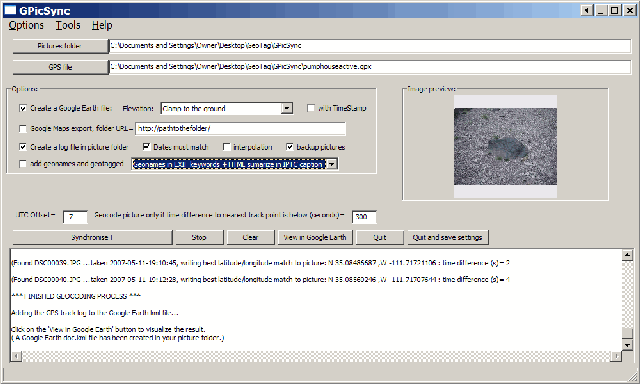
The last photo geotagging application I’ll cover for now is GPicSync, freeware from Francois Schnell. This application doesn’t have as fancy an interface as PhotoMapper, locr or Location Stamper, but it has some useful, and unique, features:

  • It just works, cleanly and neatly. Set the locations for picture folder and the GPS file (GPX or NMEA), set the correct time offset between local time and UTC (aka GMT), and click the Synchronize button to geotag the photos.

GPicSync

  • Pictures geotagged by GPicSync are recognized by Picasa right away; no need to re-process them with EXIFTool.
  • You can create a Google Earth/Google Maps KML thumbnails file at the same time you’re geotagging the photos. You can also associate audio and video files with the pictures, so that GPicSync will create links in the Google Earth / Google Maps files that link to the audio/video.
  • Handy tools include an EXIF reader, a utility that lets you manually embed geographic location into the EXIF header, a GPX file reader, and KMZ file generator to create a Google Earth file with the photo thumbnails embedded in it (unlike the KML file).
  • And there’s a newsgroup where you can interact directly with the program author, report bugs, and suggest new features.

Thanks, Francois!


Exporting KML Data From Google Maps MyMaps To A GPS

AnyGeo and OgleEarth both post today on TakItWithMe, a new free web service that lets you upload Google Maps MyMaps KML data directly from your browser to a GPS unit. It’s limited now to Garmin units, since it relies on the Garmin Communicator plugin. And while the device support page indicates that some serial interface GPS receivers will work, Garmin says that it works best with USB devices, and doesn’t promise good serial support.

For other GPS manufacturers, and for KML files created in Google Earth or by some other means on your local computer, I’ve posted before about a number of free ways to upload KML file data into a GPS unit:

Exporting Data From Google Earth To A GPS Unit
Using GPS Utility To Import/Export GPS Data To/From Google Earth
GPS Trackmaker: A Better Solution For GPS Export/Import With Google Earth

There’s another way for Garmin units, but I’m waiting until it’s out of beta to post on it ….

Addendum: Google Earth Blog points out that TakItWithMe can also convert KML files to GPX format, so that you can upload them to a non-Garmin GPS using any program that accepts GPX, like EasyGPS or GPS Trackmaker.


Photo GeoTagging II – Locr

Locr is a web album site oriented around geographic location, where you can upload geotagged photos, share them, and have them display in an album or on a map interface. Basic accounts are free, and while I assume that premium accounts will be available for a price at some point, I can’t seem to find any mention of that on the site. Geotagging can be done with separate software called “locr GPS Photo”; the software is free, and available for download even without registering for the site. Make sure you download the PDF manual as well, as you’ll probably need it. You can either manually geotag a photo using a Google Maps interface, or use GPS data to assign geotags. Here’s the basic interface:
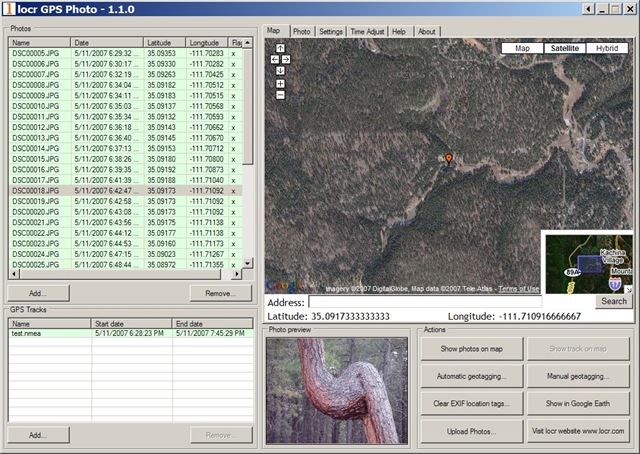
locr free geotagging application.jpg

The software does work, but it’s not without quirks, particularly for automatic geotagging with GPS data.

1. One of the biggest pains of locr is that it doesn’t accept standard GPX files for geotagging – it requires nmea files. You can convert GPX to nmea using GPSBabel, and the following procedure from the help file:

Converting gpx file into nmea format

  • Double-click the “GPSBabelGUI.exe” file to start GPSBabel.
  • In the GPSBabel window select the “Format” of the input file: “GPX XML”.
  • Click the “Start the file open dialog” button and select the respective folder and input file.
  • As “Output Format” select “NMEA 0183 sentences”.
  • Click the “Start the file save dialog” button to determine the output folder. Enter the file name. Do not forget the “.nmea” file extension!
  • In the menu click “Options” and select the “Filter” command (or click the “Filter” button).
  • In the “Filter” window activate the “GPS fixes” check box and select “pps” as option. Click “OK”.
  • Then click the “Let´s go” button.
    The gpx file will be saved in the nmea format, which then can be opened in the GPS Photo software.

Make sure you have the latest version of GPSBabel and the GPSBabelGUI. And be prepared for problems. In particular, if any of your GPX trackpoints don’t have a timestamp, GPSBabel won’t be able to create the nmea file, and will generate an error message. You’ll have to open the GPX file in a text editor, manually delete the trackpoints with no timestamp, then save the file as a new GPX file before using GPSBabel to convert it to the nmea format. Hopefully, locr will recognize the need to accept the standard GPX format in their program, and add it as an option sometime soon.

2. Sometimes, it won’t tag a photo in a series; if that happens, click on the “Clear EXIF location tags”, and that may be enough to get it to work.

3. The geographic location is written in the EXIF tag, but some programs (like Picasa) can’t read EXIF tags modified by locr. 9/3/08: I’ve heard this is no longer an issue. The problem apparently results from a problem that Picasa has reading the GPSVersionTag created by locr. There’s a fix for this: download EXIFTool, a free command-line utility for EXIF tags, re-name the executable file to exiftool.exe, copy it to the directory with the photos in it, and from the command line execute the following command:

exiftool -GPSVersionID=0.0.2.2 -overwrite_original *.jpg

This will re-write the GPSVersionID tag to one that Picasa recognizes, and Picasa will then pick up the geotagging information in those photos.

Addendum: Check this follow-up post for a GUI for EXIFTool.

On the plus side, manual photo geotagging is fairly painless – zoom in to the area in a Google Maps interface, select the photo, and click on the “Manual geotagging” button to tag it. You can also enter an address into a search box, and have that be automatically geocoded for you. You can then move the marker manually after the initial tagging to fine-tune its position. Select a group of photos that have been geotagged, and click on the “Show photos on map” button, and their positions will be indicated on the Google Map. You can also select a set of photos, and create a KML file of thumbnails for display in Google Earth with the push of a button.

If locr would accept GPX files, not have the occasional tagging glitch, and write the GPSVersionID tag properly, it would be pretty awesome. Even with those faults, though, locr is still pretty good, especially at the price.


GPS File Format Converter

Ogle Earth posts about ITNConv, a program that converts from one GPS format to another. It opens:

– Autoroute Express (.axe, .axg)
– Streets & Trips (.est)
– MapPoint (.ptm)
– MapSource (.gdb, .mps)
– TomTom 3, 5 & 6, Go, Rider, One (.itn, .ov2)
– Navigon MN|4, MN|5 & MN|6 (.rte)
– Destinator PN (.dat)
– Marco Polo, Falk Navigator, Motorrad Tourenplaner & OnRoute (.bcr)
– GPS eXchange (.gpx)
– GPX MapSource (.gpx)
– Garmin PCX5 (CartoExploreur) (.rte)
– Magellan SD (Meridian et eXplorist) (.rte, .upt)
– ViaMichelin (.xvm)
– IGN Rando (.rdn)
– OziExplorer (.rte)
– OziExplorer CE (.rt2)
– Google Earth (.kml)
– CSV (Longitude,Latitude,Comments)

And writes in:

– Autoroute Express (.axe) (Version 2004 and higher)
– TomTom 3, 5 & 6, Go, Rider, One (.itn)
– Navigon MN|4, MN|5 & MN|6 (.rte)
– Destinator PN (.dat)
– Marco Polo, Falk Navigator, Motorrad Tourenplaner & OnRoute (.bcr)
– GPS eXchange (.gpx)
– GPX MapSource (.gpx)
– Garmin PCX5 (CartoExploreur) (.rte)
– Magellan SD (Meridian et eXplorist) (.rte)
– ViaMichelin (.xvm)
– IGN Rando (.rdn)
– OziExplorer (.rte)
– OziExplorer CE (.rt2)
– XML Location (.loc)
– Google Earth (.kml)
– CSV (Longitude,Latitude,Comments)

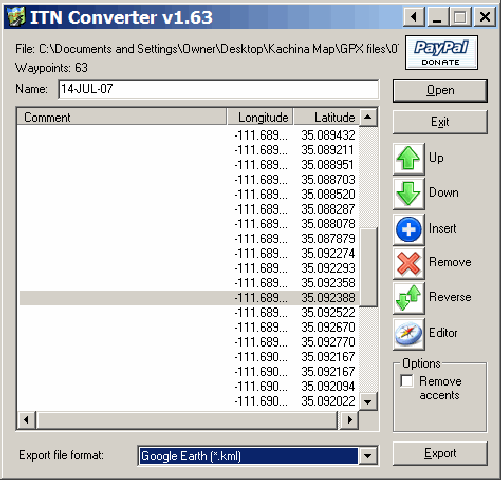
Not as many as GPSBabel, but it does a few that GPSBabel doesn’t, and the interface is a bit easier to handle:

GPS file format converter

It’s very much point-oriented, though. If you convert a GPX file with several tracks into a KML file, it will connect the endpoints of successive tracks to create one single, long track. Similarly, if you convert a set of waypoints into KML, it will connect all the points sequentially into a single long track (but you can always turn the track off in Google Earth, or delete it entirely). GPSBabel handles tracks better.

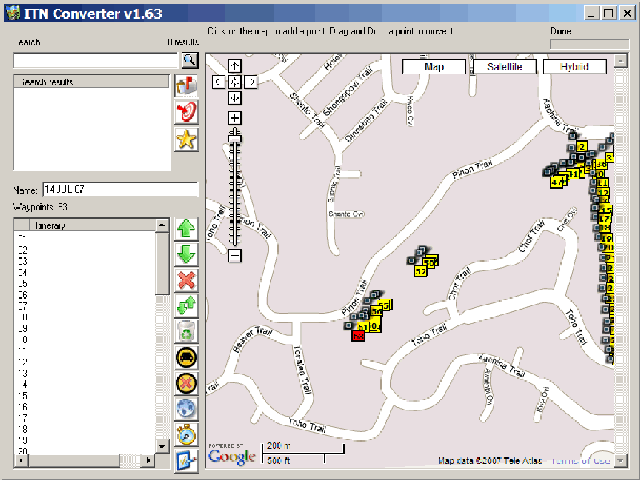
One nice touch is the built-in editor that loads the points into a Google Maps interface, where you can re-label them, move them around, add or delete points, search, find get directions, etc.. You can even create a set of points, and then save them in one of the supported formats:

GPS file format converter

Note: The website is in French, but the program itself is in English. Look for the download at the left under “Telechargement”, or at the bottom labeled “Télécharger la version Windows“.


Documenting A Journey With Maptales

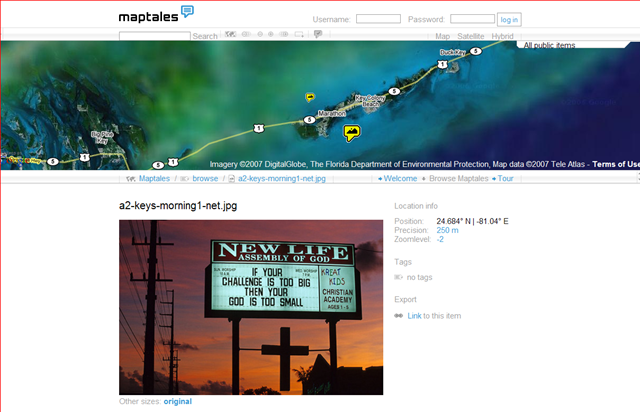
Download Squad posts about Maptales.com, a site that lets you upload geocoded photos with text (from a blog, mobile phone or Flickr) from a journey’s route to tell a story, and plots links to the journey photos in a Google Maps interface. The standard Google Maps navigation has been replaced by icons at the top (to the right of the search box), which take some getting used to. Not a lot of content right now, and you have to apply for an invitation key by email to use the site.

maptales.png


Creating GPS Waypoints Online From The USGS Geographic Names Information System (GNIS)

The USGS GNIS is a gazetteer database of close to two million geographic landmarks in the United States (and, oddly enough, Antarctica as well). Types of landmarks include manmade (airports, hospitals, populated places, etc.) as well as natural (summits, arches, cliffs, etc.). There’s a direct interface to the GNIS at the USGS’s Board Of Geographic Names website that lets you search by feature name and get:

  • Federally recognized feature name,
  • Feature type,
  • Elevation (where available),
  • Estimated 1994 population of incorporated cities and towns,
  • State(s) and county(s) in which the feature is located,
  • Latitude and longitude of the feature location,
  • List of USGS 7.5-minute x 7.5-minute topographic maps on which the feature is shown, and
  • Names other than the federally recognized name by which the feature may be or have been known.
  • Links to sites offering map viewers for graphical display of the feature
  • Link to site offering information about the watershed area in which the feature is located

You can also download tab-delimited text files for individual states, or all states in one large file.

There’s another site with GNIS data, plus some extras. Wayhoo.com lets you search a copy of the GNIS database for US features, but has some additional options as well:

  • Browse for features by county, filtering by feature type
  • Add features to a waypoint list, then export the list directly from the browser to any GPS waypoint format supported by GPSBabel (GPX, EasyGPS, Garmin MapSource, Fugawi, OziExplorer, etc.)
  • Plot the feature’s location in Google Maps, Yahoo Maps, Virtual Earth, Terraserver, and a bunch more
  • Find the National Weather Service 7-day forecast for that location
  • Find the nearest recorded Degree Confluence point
  • Find the nearest geocaches
  • And a bunch more …

And Wayhoo requires no registration; you just need to have cookies enabled on your browser if you want to create a waypoint list.


MapMyRide.com

Lifehacker posts about MapMyRide.com, a new workout-oriented Google Maps site:

  • Display a USGS topo map in addition to the standard Google Maps views
  • Measure distances
  • Import a GPS track
  • Create a route, export it to GPS or Google Earth format, annotate it with markers for parking, bathrooms, etc.
  • Calculate the number of calories you’ll burn
  • Save and track your data (requires registration)

Free, but lots of ads (the price you pay …). Some of the features (e.g. Map Settings, Workout Calculator) don’t seem to work in the Firefox browser, but work in Internet Explorer (Windows).


Sea Level Rise Google Mapplet

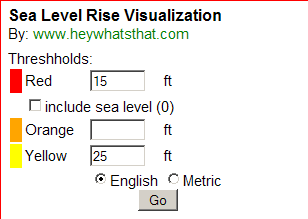
From the people who brought you Hey, What’s That? and two Google Mapplets for adding contour lines and terrain profiling to Google Maps comes the Sea Level Rise Visualization mapplet, more advanced than the Flood Maps website mentioned in a previous post. You can set three different flooding levels, and assign different colors to them (red, orange, and yellow):

sea level rise in south Florida

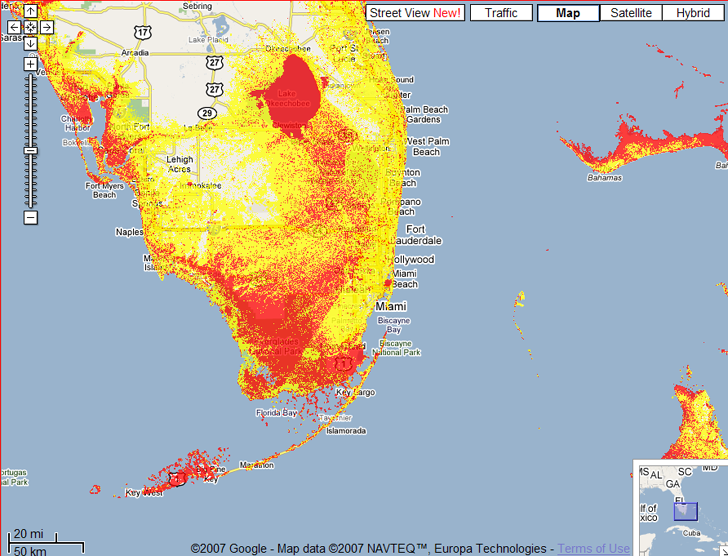
For those diehards out there, you can choose English units (feet) instead of meters, and modify the flooding level numbers and update the map quickly by clicking on the “Go” button. Leaving a level blank omits that color from the map. Here’s an image from south Florida that uses the numbers above:

sealevelrisemap

As the mapplet and my earlier post on Flood Maps point out, there are limitations to this approach deriving from the data. The SRTM data used for this has a spatial resolution of 90 meters, so the results will have a comparable spatial resolution. And SRTM data includes the heights of building and vegetation in the terrain, so urban areas like Miami will have SRTM terrain heights that are higher than the true terrain level, and the flooding level there will be undermapped by this mapplet. You’ll need to use higher resolution data with building/vegetation effects for more accurate results, as is done in this post. But for a quick estimate, this Mapplet does a nice job.Two additional tips on Google Mapplets:

– Google Mapplets aren’t currently accessible from the main Google Maps page; use this Preview link to reach a Google Maps page with an Mapplets tab

– You can reach any Mapplet by creating a single link like this one:http://maps.google.com/ig/add?moduleurl=http://www.heywhatsthat.com/mapplets/sealevel.xml&pid=mpl&synd=mpl; to test it out, just click on the link, and you’ll be given the option of adding this mapplet to Google Maps MyMaps. To create a direct link to any other Mapplet, just replace the text “www.heywhatsthat.com/mapplets/sealevel.xml” with the address of the Mapplet you want to reach. Thanks to Mike Kosowsky of HeyWhatsThat.com for this tip.