

One of the quirks of Google Earth is that while you can draw a path between points as a feature using the “Add Path” toolbar button, or measure the individual and combined distances between points using the ruler (click on the “Show Ruler” button, then the “Path” tab), there’s no automatic way in Google Earth to determine the length of a path drawn using the “Add Path” button, short of tracing over it with the ruler. But there are several utilities that can take the KML file of a path and convert it into a distance. Two of them require you to to copy the KML path data into the clipboard (right-click on the path, and choose “Copy”), then paste it into the application. The third will accept data that way, but can also open a saved KML file to do the calculation.
Archive for the 'Google Earth' Category Page 14 of 25
A clever hack for the new version of Google Earth from Valery Hronusov and Barry Hunter of nearby.uk.org. Using the new capability of Google Earth to embed Flash into placemark bubbles, there’s now a KML network link at nearby.uk.org. Open it in Google Earth, and a white arrow will appear in the center of the screen. Click on the arrow, and a bubble will pop up giving you the choice of imagery for that area from a number of different online mapping sites (e.g. Google Maps, Yahoo Maps, Virtual Earth) using Flash Earth:
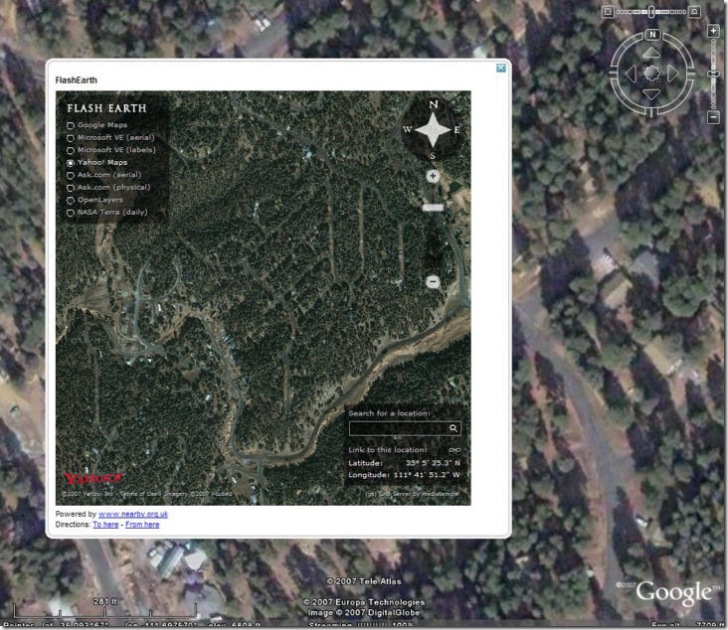
Requires the latest version of Google Earth running in Windows (GE for Mac and Linux doesn’t support embedded Flash yet).
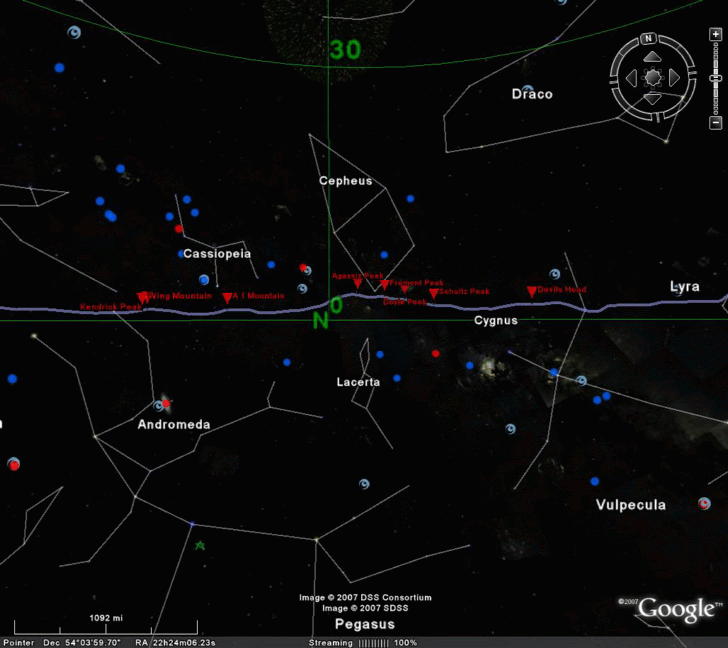
The creators of HeyWhatsThat, a site that generates panoramas and viewsheds for Google Maps and Google Earth and described in an earlier post, have added another cool feature. Generate a panorama, click on the “View in Google Earth … at night” link, have it open in Google Earth in Sky mode, and the horizon line will be plotted against the sky for the specified location, labeling each of the features. Lots of good stuff at the HeyWhatsThat site!
Ogle Earth posts on NAC Earth, a Google-Earth addon that lets you navigate to a Natural Area Coding (NAC) location. Never heard of NAC? Neither had I until this post. It’s apparently a proprietary universal address system that can assign a sequence of up to 8 letters and digits to any geographic location or landmark; Stefan at Ogle Earth describes it as the geographic equivalent of tinyurl. He also doesn’t see much need for it, and truthfully neither do I – if you want to describe a location by a semi-cryptic series of letters and numbers, you can always use MGRS. Given that the system has been around now for five years without picking up any traction, I’m guessing others feel the same way.
Need to convert a set of geographic coordinates to an NAC code? Try Barry Hunter’s online coordinate converter. The NACGeo site also has some free online services for looking up and plotting NAC locations.
Google Earth can display a scalebar in the lower left-hand corner of the display:
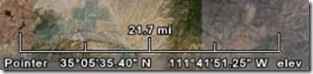
If you don’t see it, you can turn it on by selecting View => Scale Legend from the top menu. While it’s useful, it also has the drawback that it stays the same size on-screen as you zoom in and out, only the number above it that represents its length changing.
There’s a dynamically-sizable scalebar available as a network link from Safety Dave, available in two flavors (metric and English). Download the KMZ file, and open it in Google Earth; a colored bar will appear in the upper-left-hand corner, labeled with a specific distance:

As you zoom in, the bar will get longer and longer, until it fills the top edge of the display. Zoom in further, and it will shift automatically to a new scale 10x smaller than the previous one. For example, metric will go from 10 km to 1 km to 100 meters; English would go from 10 miles to 1 mile to 500 feet. The reverse will happen as you zoom out; zoom out too far, and the scalebar gets replaced by an error message.
You can always use the “Show Ruler” tool from the top toolbar to measure and display distances.
OgleEarth posts about the King’s College Geodata portal, a terrific set of data overlays for Google Earth (static, network-updated, and temporal). Current datasets include:
- Tiputini Biodiversity Station
- Terrascope (new)
- TRMM 2b31-Based Rainfall Climatology
- Amazon-eye
- Tropical montane cloud forests
- MODIS Cloud climatology
- SRTM SWBD Coast and water bodies
- Petroleum-related impacts in the Amazon
- AsterPAA (TerraLook) in Google Earth
- GNS places database
- Monthly NASA blue marble SG
- Hole-filled SRTM 90m Digital Elevation Data
- Sea level rise scenarios
- Global forest change (2000-2005) from MODIS VCF
- Three-hourly rainfall time series (from TRMM 3B42)
- Monitoring Volcanoes
- Urban climates
- Tropical Hydrology : climate and land use impacts
- Central American and Costa Rican Climate and Hydrology
And, of course, there’s a lot more similar datasets at the Google Earth Library.
The last photo geotagging application I’ll cover for now is GPicSync, freeware from Francois Schnell. This application doesn’t have as fancy an interface as PhotoMapper, locr or Location Stamper, but it has some useful, and unique, features:
- It just works, cleanly and neatly. Set the locations for picture folder and the GPS file (GPX or NMEA), set the correct time offset between local time and UTC (aka GMT), and click the Synchronize button to geotag the photos.
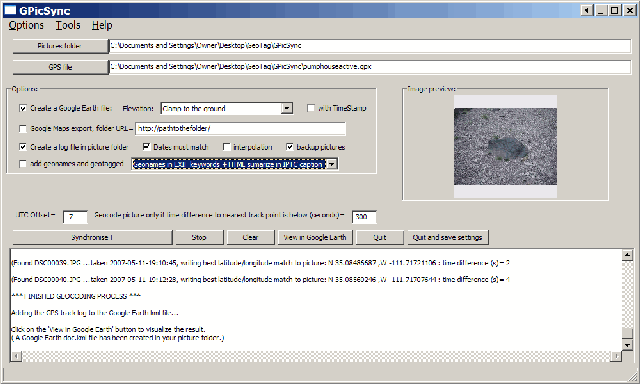
- Pictures geotagged by GPicSync are recognized by Picasa right away; no need to re-process them with EXIFTool.
- You can create a Google Earth/Google Maps KML thumbnails file at the same time you’re geotagging the photos. You can also associate audio and video files with the pictures, so that GPicSync will create links in the Google Earth / Google Maps files that link to the audio/video.
- Handy tools include an EXIF reader, a utility that lets you manually embed geographic location into the EXIF header, a GPX file reader, and KMZ file generator to create a Google Earth file with the photo thumbnails embedded in it (unlike the KML file).
- And there’s a newsgroup where you can interact directly with the program author, report bugs, and suggest new features.
Thanks, Francois!
Locr is a web album site oriented around geographic location, where you can upload geotagged photos, share them, and have them display in an album or on a map interface. Basic accounts are free, and while I assume that premium accounts will be available for a price at some point, I can’t seem to find any mention of that on the site. Geotagging can be done with separate software called “locr GPS Photo”; the software is free, and available for download even without registering for the site. Make sure you download the PDF manual as well, as you’ll probably need it. You can either manually geotag a photo using a Google Maps interface, or use GPS data to assign geotags. Here’s the basic interface:
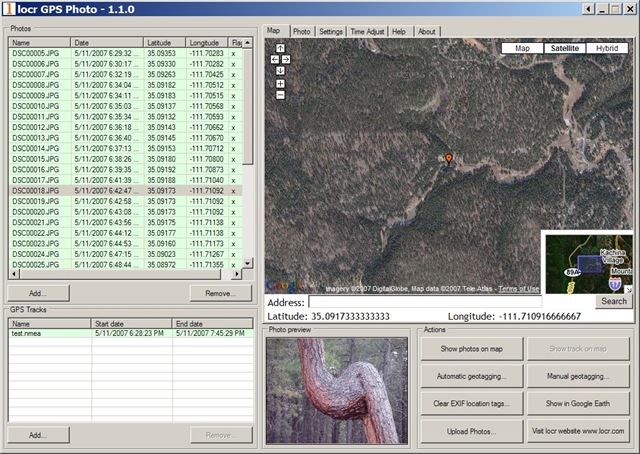

The software does work, but it’s not without quirks, particularly for automatic geotagging with GPS data.
1. One of the biggest pains of locr is that it doesn’t accept standard GPX files for geotagging – it requires nmea files. You can convert GPX to nmea using GPSBabel, and the following procedure from the help file:
Converting gpx file into nmea format
- Double-click the “GPSBabelGUI.exe” file to start GPSBabel.
- In the GPSBabel window select the “Format” of the input file: “GPX XML”.
- Click the “Start the file open dialog” button and select the respective folder and input file.
- As “Output Format” select “NMEA 0183 sentences”.
- Click the “Start the file save dialog” button to determine the output folder. Enter the file name. Do not forget the “.nmea” file extension!
- In the menu click “Options” and select the “Filter” command (or click the “Filter” button).
- In the “Filter” window activate the “GPS fixes” check box and select “pps” as option. Click “OK”.
- Then click the “Let´s go” button.
The gpx file will be saved in the nmea format, which then can be opened in the GPS Photo software.
Make sure you have the latest version of GPSBabel and the GPSBabelGUI. And be prepared for problems. In particular, if any of your GPX trackpoints don’t have a timestamp, GPSBabel won’t be able to create the nmea file, and will generate an error message. You’ll have to open the GPX file in a text editor, manually delete the trackpoints with no timestamp, then save the file as a new GPX file before using GPSBabel to convert it to the nmea format. Hopefully, locr will recognize the need to accept the standard GPX format in their program, and add it as an option sometime soon.
2. Sometimes, it won’t tag a photo in a series; if that happens, click on the “Clear EXIF location tags”, and that may be enough to get it to work.
3. The geographic location is written in the EXIF tag, but some programs (like Picasa) can’t read EXIF tags modified by locr. 9/3/08: I’ve heard this is no longer an issue. The problem apparently results from a problem that Picasa has reading the GPSVersionTag created by locr. There’s a fix for this: download EXIFTool, a free command-line utility for EXIF tags, re-name the executable file to exiftool.exe, copy it to the directory with the photos in it, and from the command line execute the following command:
exiftool -GPSVersionID=0.0.2.2 -overwrite_original *.jpg
This will re-write the GPSVersionID tag to one that Picasa recognizes, and Picasa will then pick up the geotagging information in those photos.
Addendum: Check this follow-up post for a GUI for EXIFTool.
On the plus side, manual photo geotagging is fairly painless – zoom in to the area in a Google Maps interface, select the photo, and click on the “Manual geotagging” button to tag it. You can also enter an address into a search box, and have that be automatically geocoded for you. You can then move the marker manually after the initial tagging to fine-tune its position. Select a group of photos that have been geotagged, and click on the “Show photos on map” button, and their positions will be indicated on the Google Map. You can also select a set of photos, and create a KML file of thumbnails for display in Google Earth with the push of a button.
If locr would accept GPX files, not have the occasional tagging glitch, and write the GPSVersionID tag properly, it would be pretty awesome. Even with those faults, though, locr is still pretty good, especially at the price.