blankblank blank


Archive for the 'GPS' Category Page 11 of 25


A (Reasonably) Cheap Portable Auto Mount For Handheld GPS Units

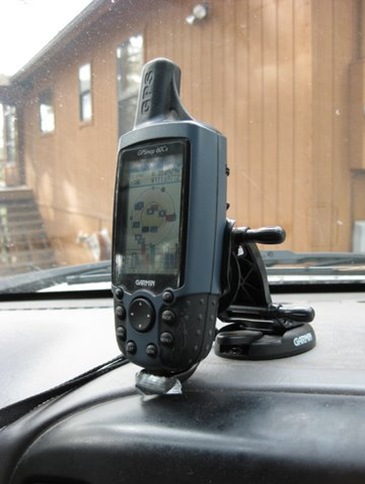
For my regular car, I use a standard Garmin adjustable bracket mount to hold my Garmin 60Cx handheld GPS receiver:
bracket

Works fine, position is adjustable – great. But I can’t really use it easily in another car, since it slides into a bracket mounted with adhesive on the dashboard, and I’d need to glue a similar bracket into the other vehicle. Sticking the GPS into a cup holder, or holding it in my hands, isn’t always an option. On a recent field survey trip, I needed to be able to read the location while driving over a very rocky surface while dodging creosote bushes. Holding the GPS in my hands while keeping control of the steering wheel was …. interesting.

So when I stumbled across the Vent Mount from TheClip.com, it looked like a possible solution: a cheap GPS mount that you stick into a car’s vent, and can be easily moved from car to car. The mount is pretty straightforward, four pieces of molded plastic that snap together; here’s a side view (picture from the website):

3-8-2009-7.48.35 PM

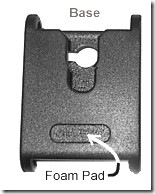
The two pieces at upper right slide into one of the louvers in your car’s ventilation system, with the lower brace holding the mount base in place:
3-8-2009-7.57.10 PM

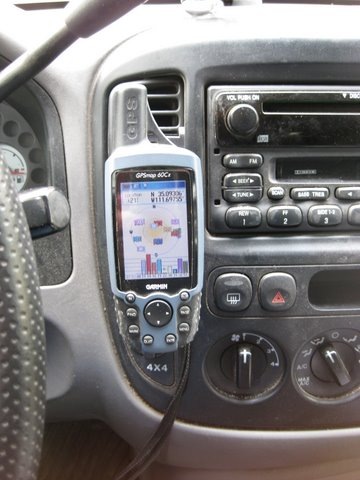
The GPS is mounted on the base by sliding a round swivel tab (like those found on many cellphones that slides into a belt clip) into the notch at the top. My GPS comes with a swivel tab as standard equipment:
vent

If you have a GPS that doesn’t have a tab, they include three tabs and high-strength adhesive pads to stick them on the back of your GPS unit. You could also use the extra tabs for cellphones, PDAs, MP3 players, or any other portable electronic device you might want to have handy in your car.

Overall, the product seems to work quite well; the GPS stays in place even on rough roads, and there’s enough room between the GPS and the vent for air to flow. But a few caveats:

  • It will work on vents with horizontal or vertical louvers, and ones that swivel left and right; but not on vents that swivel downwards. Mount your GPS on a downward-swiveling vent, and it will droop into an unviewable position
  • You may have to play around a bit with the installation configuration; in my car, the vent snaps worked better when they were rotated 180 degrees from the normal position. YMMV.
  • Once you figure out the trick of installing and removing it from a car’s vent, it literally takes only a second to do. However, learning how to do that trick may take a couple of minutes, possibly interrupted by a curse or two.
  • For some units (like mine), there’s not enough clearance for the external power connector/USB connector in the back; for those, you’ll have to use it on battery power alone.
  • List price is reasonable ($8.99), but then they tack on $5 for shipping, which seems a bit steep. Still, it’s a lot cheaper than a standard Garmin auto bracket mount ($25-30), and if I had known about it, I might not have bought that Garmin mount.

Overall, I’ve found the Vent Mount useful, and would recommend it if you need to use a handheld GPS in more than one car.

Full disclosure: I paid full price for this item, and this is an unpaid and unsolicited endorsement.
Lots More 1:24K-Equivalent Garmin Topo Maps Now Available

Since my last update on free 1:24K-equivalent topo maps for Garmin GPS units from GPSFileDepot, there’s been a huge explosion in the number of states covered:

  • Southeast US: Covering all of Alabama, Florida, Georgia, Mississippi, North Carolina, South Carolina, and Tennessee; parts of Arkansas, Kentucky, Louisiana, Missouri, and Virginia
  • South-Central US: All of New Mexico, Oklahoma, and Texas; parts of Arkansas, Louisiana, and Missouri
  • Southwest US: Covering all of Arizona, parts of CA, UT, and NV
  • Illinois: The entire state
  • New England: A combination of mapsets previously available separately for MA, ME, VT, NH
  • Montana Landowner Topo: The whole state, with special colors identifying landowners
  • New Jersey: Entire state
  • New York: Entire state
  • Ohio: Entire state
  • Washington: Entire state
  • West Virginia: Entire state

Windows installers available for all, Mac for many. Part of the reason for this flurry of activity may be that Dan Bloomberg, webmaster for the site and creator of most of the older maps, has released a new tool called Topo Process that simplifies the process of obtaining and processing the data necessary to create these topo maps. While the official Garmin 1:24K topo maps have more features, like elevation profiles, routing, and shading in supported units, much more of the US is covered by these free maps than is currently available from Garmin. And you can’t beat the price.

In addition to the topo maps, a browse through the Custom Maps directory will bring up lots of other specialty maps and data, like trails, POIs, and even raster maps for a few areas like Joshua Tree National Park.


Create A Random Point Or Evenly-Spaced Point Grid Shapefile Within A Defined Area

Got an email question about how to create point grids in GIS format with free software, and the off-the-top-of-my-head solution was fGIS. fGIS (Forestry GIS) is a decent freeware GIS developed by the Wisconsin Department of Natural Resources using the TatukGIS Developer Kernel. Up until late 2005, updated versions were being released regularly as freeware, but a change in the Kernel licensing conditions made that impossible for future versions. The last free version is still available, but is not guaranteed to be bug-free and will never be fixed or updated. Still, it has some useful utilities, including the “Generate Cruise Points” tool, available from the Utilities menu; this tool lets you create random and regularly-spaced point shapefiles for a defined area.

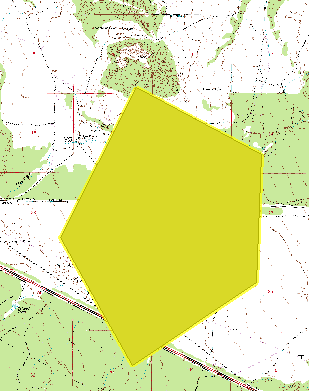
Start up fGIS,  and you’ll be asked to define a project name right away. The coordinate system will be defined by the first layer you add, either raster or vector, and whatever data layers you add to the program must be in the same coordinate system. The program supports many different formats, vector and raster, including shapefile and GeoTiff. You’ll need to have the area you want gridded defined by a vector layer, either one you open or one you create using the program’s vector editing functions; e.g. you could open a raster GeoTiff, then draw a polygon defining the area you want gridded on top of the raster image. You also need to highlight the polygon area you want to have gridded using the “Pick” tool (the red arrow icon at the top):

2-4-2009-2.54.08 PM

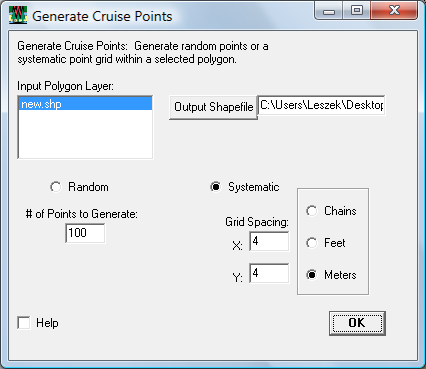
Then select Utilities => Generate Cruise Points:

2-4-2009-2.54.49 PM

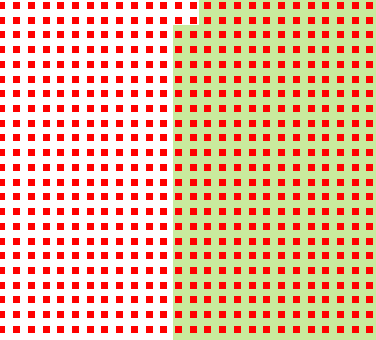
Here, new.shp is the polygon shapefile with the highlighted area to be gridded; specify the output grid point shapefile by clicking on the “Output Shapefile” button (entering the directory in the box at right has no effect). Then choose either a random grid and the number of random points, or a systematic grid with the desired spacing and units. Click OK, and the grid shapefile will be created and added to the map view; if the area is large, and the spacing is small, this may take a while. Here’s that grid shapefile plotted on top of the original raster (zoomed in very close):

2-4-2009-2.53.21 PM

With software like DNRGarmin, you could upload such a grid to your GPS as a set of sampling points.


Splitting A GPX Track Into Smaller Files

Some GPS models, such as most Garmin handheld units, allow you to record up to 10,000 points as the active track. But if you save an active track with more than 500 points, the unit will automatically simplify the track to a maximum of 500 points, dropping what it considers to be redundant or unnecessary points; you have no control over which points get dropped by the unit. One option is to simplify the track yourself with GPS Trackmaker’s Tracklog Reducer, which also drops points but gives you some control over the degree of simplification. But if you absolutely have to preserve all the points, there’s another option; GPX Track Splitter lets you chop a track with more than 500 points into a set of smaller tracks that come in under this limit, but which preserve all the points.

Continue reading ‘Splitting A GPX Track Into Smaller Files’


GPS Support Added To Free Version Of Google Earth

A few months ago, Google discontinued Google Earth Plus, their $20/year augmented version of Google Earth. At the time, they said they would add one of Plus’s key features, support for direct connection of a GPS receiver, to the free version in the near future. With this week’s release of Google Earth 5.0, lots of attention has been paid to its big new features (ocean coverage, historic imagery, tour recording); see Ogle Earth and the Google Earth blog for more info on those. But I’ve only seen one or two mentions that this latest version adds GPS support.

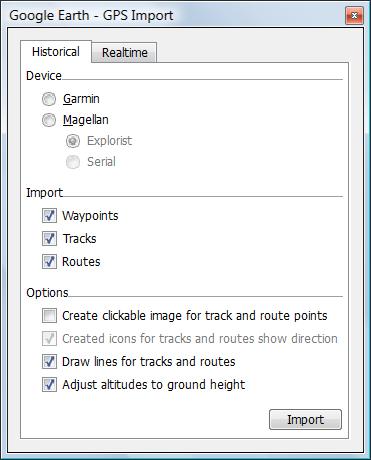
Access the GPS control with Tools => GPS:

Google Earth GPS import

The Historical tab lets you import waypoints, tracks and routes from either a Garmin or Magellan GPS (the only brands currently supported). Garmin support should include the serial as well as USB interfaces, but I don’t have a serial connection to test that. Checking the “Create clickable image …” link assigns icons to the track/route points with pop-up data for them; checking the box below that creates icons to show the direction of movement.

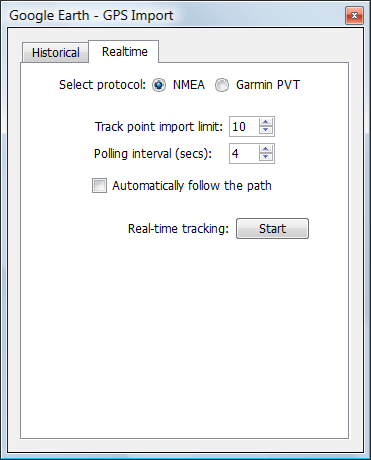
The Realtime tab shows the options for live tracking of your position in Google Earth:

Google Earth GPS tracking

Currently, it supports only the Garmin protocol and NMEA (serial connection, either through a serial port or Bluetooth); I’ve tried both, and it does a good job of finding the correct port. Polling interval determines how often GE gets position data from your GPS, while “Track point import limit” determines how many position points are imported and averaged for every polling. More points means a slower position update, but a more accurate one; less points updates your position more quickly, but potentially at the cost of accuracy. If you have a high-quality GPS receiver, with strong satellite reception, accuracy is unlikely to be a serious issue, and you can probably set the track point import limit to a low number.

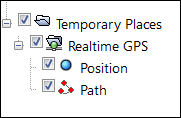
Checking the “Automatically follow the path” box will make Google Earth automatically zoom to the current GPS location, and follow it as it changes. The only view you have with this option is from overhead; if you change to an oblique view, it will automatically move the view back to overhead. The option is ghosted out as soon as you start tracking, so if you don’t check the box, the only way to immediately zoom to the current GPS position is to go into “Temporary Places”, find the Position marker in the RealTime GPS folder, and double-click on it:

2-3-2009-10.45.14 AM2-3-2009-9.49.06 PM

If you move, it also saves your path and displays it onscreen; to save it permanently when you’re done, you’ll have to right-click on the “Path” listing and save it as a KML file. I believe the Position icon is supposed to show up in the Google Earth display to show your current position, but for static positions it disappears almost immediately.

For simplicity and convenience, Google Earth’s built-in GPS interface is hard to beat. But for real-time tracking, the feature set is pretty weak; the limited GPS receiver support, the inability to view from an oblique angle with live tracking, and problems with icon display (and lack of choice for the icon) are serious drawbacks. The data import feature also isn’t that great; you’d be better off using a program like EasyGPS or GPSTrackmaker to import data from your GPS, and then save it either in GPX format (which Google Earth can open), or directly in KML format. The free version of GPS Trackmaker comes with a real-time GPS position interface which supports more units than Google Earth, and which can plot your rea-time position in Google Earth. There are other options for GPS real-time tracking and data import into Google Earth as well; do a search on this blog for “Google Earth” and “GPS”.


Downloading MapQuest, Live Search Results To A Garmin GPS

A while ago, I covered the process of downloading a Google Maps search result to a Garmin GPS, using the Garmin communicator plugin. The Garmin blog has posted videos on how to do the same thing with Microsoft Live Search:

MapQuest:


and Google Maps as well:


You will need to have downloaded and installed the Garmin Communicator plugin first; versions are available for both PC and Mac.


Breaking Up A Garmin gmapsupp.img Map File Into Separate Map Tiles

Yesterday’s post was about CloudMade, a website where you can download Garmin map files based on OpenStreetMap data for any country in the world that has OSM data. But all the map tiles for a country or state are combined into a single gmapsupp.img file, which means you can’t install the tiles into Garmin’s MapSource program. Because of this limitation, you can’t combine them with other mapsets and upload them to your Garmin GPS using MapSource. But there’s a simple way to break that gmapsupp.img file into the component subtiles, which can then be installed into MapSource, and uploaded with other mapsets.

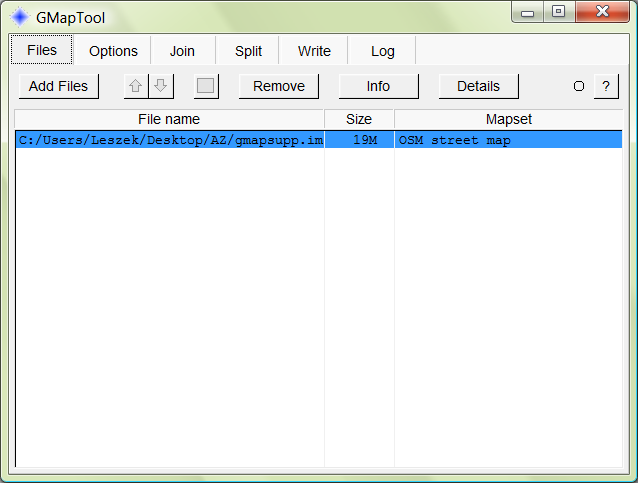
First, download the program gmaptool, and unzip it into the directory of your choice; this used to be a command-line utility, but now comes in a handy GUI format that drives the command line tool gmt.exe. Next, start up the program, navigate to the directory that contains the gmapsupp.img, and open the file:

gmaptool GUI

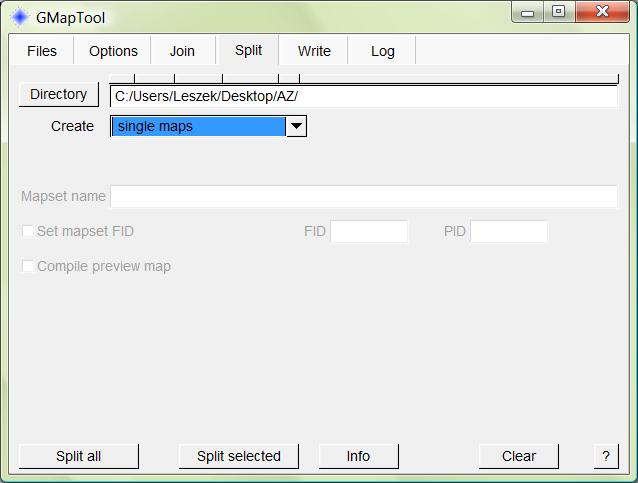
Click on the Split tab, select the directory you want to put the tiles in, and select “single maps” from the dropdown:

11-9-2008-9.11.34 PM

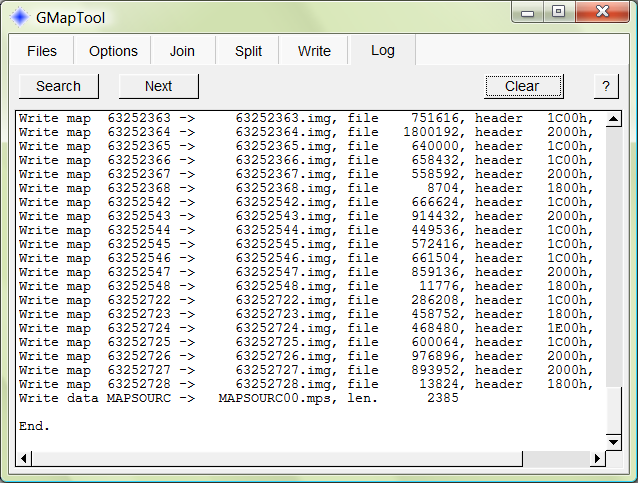
Click on the “Split all” button, and the subtiles contained with the gmapsupp.img file will be extracted, and listed in a status window:

11-9-2008-9.13.54 PM

You can now use a program like MapSet Toolkit to install the tiles for viewing in MapSource, and uploading individually or combined with other mapsets into your Garmin GPS:

11-9-2008-9.15.17 PM

Note: The dropdown on the “Split” tab includes the option for creating files for installing the tiles directly into MapSource, but it doesn’t seem to be working right now. Running the install.bat file gives an error message saying that the needed program cgpsmapper can’t be found, and specifying the path for this file under the Options tab doesn’t solve the problem. I suspect this will work at some point in the future.

The command line program gmt.exe driven by the GMapTool GUI contains many additional advanced functions for handling Garmin map files, not all of which are currently accessible using the GUI, including removing/changing unlock codes (no, this won’t let you pirate Garmin mapsets), making maps transparent, and more. Check the readme.txt file that comes with the program for more info; there’s also a “gmaptool_en.html” help file with more info on the GMapTool GUI.


More Garmin Maps From Open Street Map Data

Apropos of the previous post on Garmin maps from Open Street Map (OSM) data, there’s a listing of Garmin mapsets for a limited number of countries at the OSM wiki site. Some come with installers, others are .img files that you will need to install into MapSource using MapSet Toolkit. Included are a set of Garmin map tiles for the entire world from computer:teddy, which you could use to create a Garmin mapset for any country. But the process is a bit time-consuming, and the instructions on the web page are in German; if you don’t read German, you may be better off with the CloudMade maps.

HT to Rich Owings of GPS Tracklog.