Here are three more completely free ways to do real-time GPS tracking with the free version of Google Earth.
GE-Remote – Freeware; NMEA only
No installation for this program – just unzip to your desired location and run it:
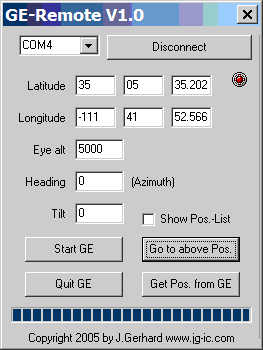
Set the COM port to the one your GPS is hooked up to, then click on “Connect to GPS (NMEA)” to establish a connection to your GPS. Next, click on “Start GE” to start Google Earth. An error window will pop up for GE-Remote; click on “No” to continue the program. Click on “Go to above Pos.”, and you’ll get another error message stating that Google Earth hasn’t been started. Click on “Start GE” again, and you’re now good to go. Note: if you click on “Start GE” before connecting to your GPS, you will avoid some of these error messages, but there’s a very annoying side-effect; try it and see. Anyhow, GE-Remote doesn’t let you set tilt, altitude and heading from the regular Google Earth controls – you’ll have to enter your desired values in the boxes above. Once done, click on “Go to above Pos.”, and you’ll be taken to a view of your current location, with the set viewing attributes, and the view will change to follow your position if you move. But the biggest drawback to this program, a huge drawback, is the lack of a marker on-screen to show your position. If you can live with that, GE-Remote doesn’t do too bad a job.
GPS TrackMaker – Freeware; NMEA and proprietary protocols
I’ve posted about GPS TrackMaker before; in addition to its other capabilities, it does real-time GPS tracking in Google Earth. And it’s the only free option I’ve found that supports some proprietary GPS protocols in addition to NMEA. To enable real-time tracking, go to the Interface menu, and choose either the appropriate proprietary protocol for your GPS or NMEA. With NMEA, the program’s Real-Time Navigation Console will open immediately; for proprietary protocols, you’ll have to manually open the Console. For example, with Garmin units, after establishing a connection to your GPS you’ll have to press the “Garmin PVT Data” button to open the Console.
Once you have the Real-Time Navigation Console open and running, you can initiate real-time tracking in Google Earth by clicking on the Google Earth icon in the toolbar at the top. Google Earth will open automatically, a network link called GPS TrackMaker will appear in Temporary Places, and you will zoom in to a view 10,000 feet above your marked current position:
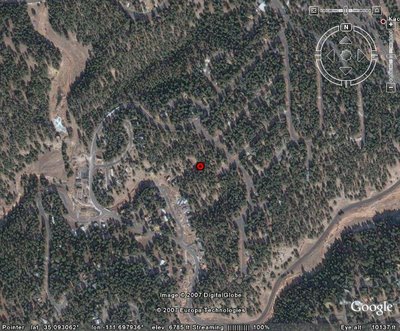
Try changing the viewing altitude or angle, though, and the network link won’t let you – it will snap back to the vertical view from 10,000 feet. You can get around this by going to the GPS TrackMaker link => Real-Time Navigation sublink in the Google Earth Places pane on the left, right-clicking on the sublink and choosing Properties. Select the Refresh tab, uncheck “Fly to View on Refresh”, and you can now change the viewing angle and altitude. But now the view won’t change as your actual position changes; the view will remain fixed, while the dot that represents your position will move within that view. You can always modify the view manually to keep your position dot in view on the screen, but not changing the view to follow your current position is this program’s biggest weakness. Still, probably the best of the completely free options.
nmeaGE – Freeware; NMEA only (5/2/2009: may no longer be available)
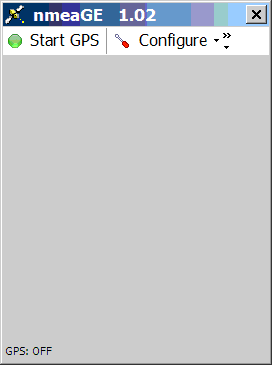
Run the installer, and it puts a program icon on your desktop. Run it, and the following window comes up:
Under Configuration, there are four suboptions:
GE Settings:
Lets you specify the name of the KML network link used to track your current position, and the position refresh rate. Checking “Automatically Start Google Earth” will open up GE when you start tracking your GPS position, which is probably what you want. Leave “Create Network Link” checked if you want continuous real-time tracking, otherwise only a single current umoving position will be show in GE. Enter the name of your network link below, as well as how often you want your position refreshed.
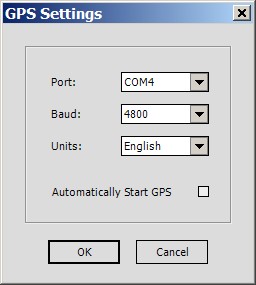
GPS Device:
Sets the COM port your GPS is hooked up to, the baud rate (normally 4800), and your units (English or metric). Checking the “Automatically Start GPS” box means that it will try to start reading your GPS position as soon as you start up the program; otherwise, it will wait until you click on “Start GPS”.
HotKeys:
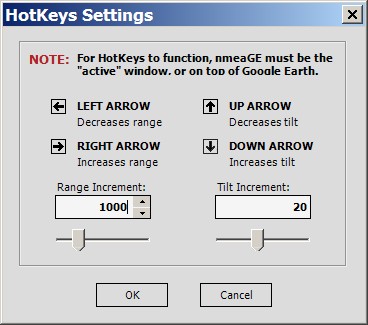
The biggest quirk of nmeaGE is that it takes over much of the control of the tilt and altitude from Google Earth; you’ll have to use the arrow keys to perform those tasks instead of the normal on-screen controls, and this control lets you adjust how much hitting an arrow key will adjust tilt or altitude.
KMLExport:
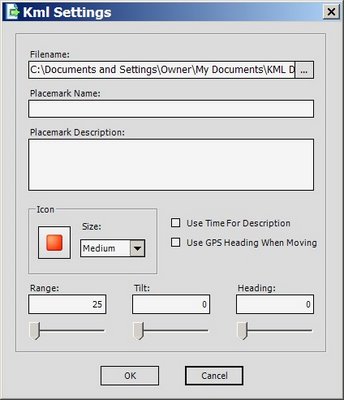
Sets basic parameters for an exported KML waypoint file, including default view and icon characteristics.
Once you’re done with the configuration settings, and if your GPS is connected and turned on, click on the Start GPS button to start tracking:
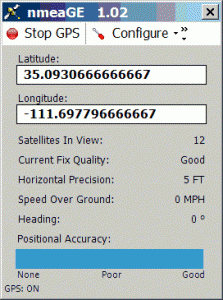
Sometimes nmeaGE can’t connect to the GPS right off, but a re-boot usually fixes that problem. If you’ve got “Automatically Start GE” checked off in settings, Google Earth will open up after you click this button, and you’ll zoom to your current position marked by a red square. Use the arrow keys to change your tilt and altitude, and be prepared for a very slow, and very annoying, delay between when you press an arrow key and when you get a response. Still, once you’ve set the altitude and the tilt angle, it works fine, and changes the view to keep you centered as your position changes.

