Note: PhotoFly is now 123D Catch; click here for the main product page.
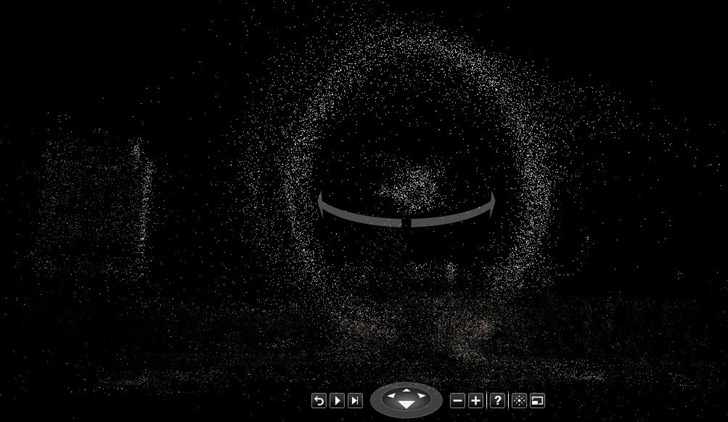
A few years ago, Microsoft make a big splash with Photosynth, a program that analyzes 2D photos of an area, computes their relative orientation, and lets you view them in a quasi-3D environment. Here’s a live Photosynth of the London Eye:
PhotoSynth actually calculates a 3D point cloud from all the photos…

… but the photo views are still in 2D, i.e. they’re not overlaid on top of the 3D data. And there’s no easy way to get the 3D data out; there’s a hack to do that outlined here that can do it, but it’s a pretty complicated process.
AutoDesk Labs has just released version 2.1 of their free program PhotoFly, which can take 2D photos of an object or environment and generate a full 3D model with a photo texture overlaid on top of it. This thing is jaw-droppingly amazing, not least for how easy it is to do:
1. Shoot photos of an object or environment from multiple positions. A simple point-and-shoot digital camera will work, though AutoDesk recommends a wide-angle DSLR for some applications. They have a full video tutorial on how to get the best results.
2. Install the PhotoFly Photo Scene Editor software on your computer (Windows only).
3. Select the photos you want to use to create the model; PhotoFly will upload them to AutoDesk’s servers, which process them, generate the 3D model and texture, and then let you download them for viewing on your home computer.
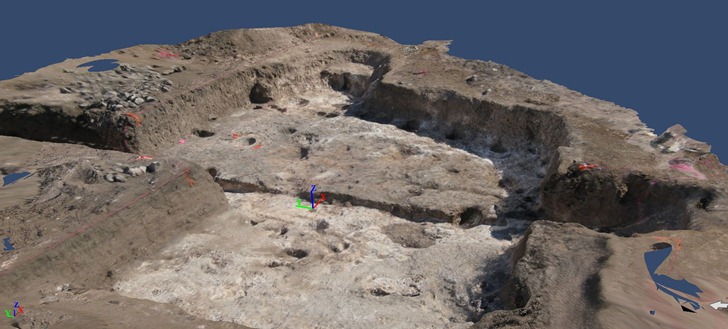
I had some photos taken for PhotoSynth of an archaeological excavation of a pithouse I did back in 2008; I selected a number of them, and uploaded them to PhotoFly. Though the pithouse was reburied three years ago, I was able to see an incredible 3D reconstruction:

This isn’t just a static oblique view – this is a fully interactive 3D model. You can pan/tilt/rotate the model using the software in real-time. PhotoFly even includes a movie maker that lets you create animated “flythroughs” of the model; here’s one I generate from the pithouse model above:
All the 3D model and texture data is stored on AutoDesk’s servers; if you share the 3dp PhotoFly file with someone else who has PhotoFly installed on their computer, that data will automatically be downloaded to their computer for local viewing. You can try that with the 3dp file for the pithouse above, which I’ve put online for download.
What else can you do?
- While the initial scene isn’t georeferenced, if you have coordinate positions for a spot in the scene, you can use those to georeference the entire scene.
- You can use object with known dimensions to calibrate the dimensions of the entire scene, then do accurate measurements of any object in the scene.
- PhotoFly calculates presumed xyz orthogonal (perpendicular cartesian) directions, but if you have a known horizontal or vertical direction, you can modify those directions to match the known direction.
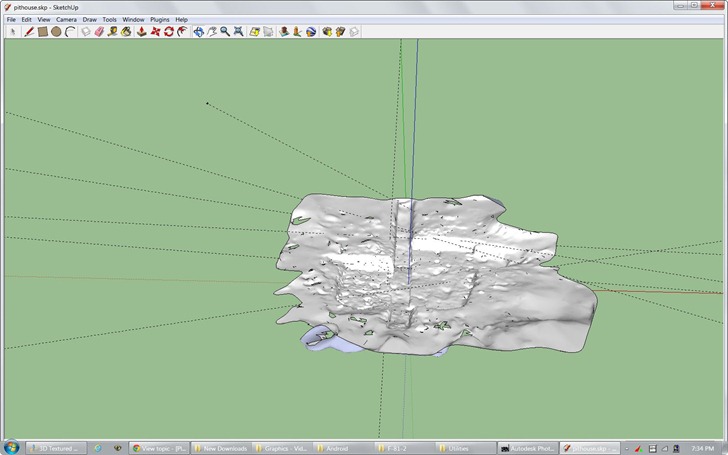
- You can export the 3D model and textures in a number of standard formats, including DWG, OBJ and LAS. You could then import them into a 3D-capable program like Blender (free and open-source) for editing or animations. Georeferencing and calibration data is included in the export.
- If you use a OBJ file importer in Google Sketchup, you can load the 3D object into that program:

- Export into Inventor Publisher Model format (ipm) for viewing on iPhone and Android devices (couldn’t get the Android viewer to work, though).
- You’re not limited to 3D spaces; you can shoot and create a 3D model of an object like a sculpture, artifact, piece of furniture, etc..
Drawbacks:
- Only works with unedited photos from a digital camera; no scanned photos, or photos modified in a digital editor. This is in contrast to PhotoSynth, which can combine digital camera photos with scanned historical photos.
- AutoDesk says you need to take at least three photos from different angles, but I’ve found that’s way too few – you wind up with holes in your scene. Take as many photos as you can, and try to make sure that every spot you want in the scene is visible in at least three photos. And definitely follow AutoDesk’s shooting guidelines.
- All the photos should be taken at the same time, and with comparable exposures, for best picture matching.
- Sometimes, the program hangs up with a large number of photos to upload; in that case, reduce the number of selected photos and try again.
- Sometimes, large chunks of the scene appear to be missing; selecting a reduced set of photos and trying again can sometimes fix this.
- Sometimes, some photos can’t be correctly matched to the proper scene, and aren’t used. However, the Photo Scene Editor includes a utility that lets you manually match points in the unmatched photos to corresponding points in a matched photo. Tip: If you have a large number of unmatched photos, only manually match one photo that is representative of all the unmatched photos, then resubmit the scene for processing; more often than not, the addition of that manually-matched photo allows other unmatched photos to be processed.
- While you have the option of waiting for a scene to be processed, or being emailed when it’s done with a download link, I recommend always asking for an email; I’ve had occasions where a scene I waited to get processed got lost somehow.
- Finally, while the program is free now, AutoDesk has only committed to keeping it free until the end of 2012; at that point, it may charge for some services, or discontinue it entirely. However, any scenes exported into another format (e.g. OBJ) can be kept and used in program that support that format.
AutoDesk is still actively working on the program, so I’m sure some of these issues will be fixed eventually. But even with these drawbacks, it’s a pretty freaking amazing program that you should definitely check out.