GPS units are often used to gather data for export to, and use in, GIS. But there may be times when you might want to do the opposite – take GIS data and export it to a GPS. For example, you might have an area shapefile demarcating survey areas, and it could be helpful to import the boundaries of that area into your GPS unit, so that you’ll know when you’re inside (or outside) the survey area. Or you might have a point shapefile with the positions of sampling spots; it would be convenient to be able to import those sampling spot positions into a GPS as waypoints, and then use the waypoint positions to navigate to them. Two of the programs I’ve posted about earlier have the capability to import GIS data in shapefile format into a GPS unit.
There are three kinds of shapefiles: point, line, and area/polygon. But there are only two standard kinds of position data that can be imported by a GPS, points (waypoints) and lines (tracks and routes); areas aren’t a supported data type. But that’s not a problem here, because both of the programs I’ll talk about convert area shapefiles into a line that describes the perimeter of the area, which can be exported to a GPS unit.
GPS Trackmaker – This program has the ability to open point, line and area shapefiles, and upload the data to a GPS. While the program has some support for grid coordinates systems like Transverse Mercator, it’s easier to work with the data if it’s already in the WGS84 geographic coordinate system (lat./long.), the standard for most GPS units. When you open a shapefile, GPS Trackmaker will ask you which of the shapefile data fields (attributes) you want to use to label the shape; this label that will be used to identify the uploaded feature in the GPS.
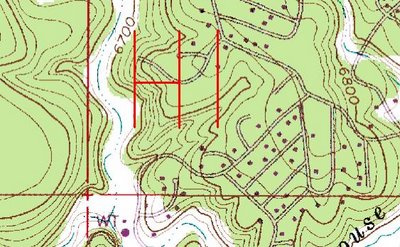
Here’s an example of a line shapefile, with four independent line segments, drawn in a GIS on top of a topo background:
This shapefile was saved in WGS84 geographic coordinates, and then opened in GPS TrackMaker. With the GPS connected and turned on, the Interface menu was used to select the kind of GPS unit (Garmin in this case). The “Send To GPS” button was pressed to enable uploading to the GPS, and “Send Tracklogs as Active Log” was unchecked, so that the line data would be saved in the track directory rather than as the active track:
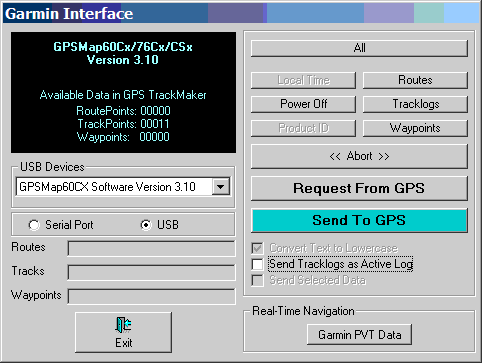
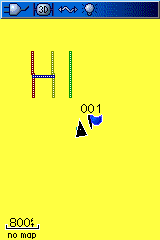
Clicking on the “Tracklogs” button uploaded the four line segments to the Garmin GPS unit as four separate tracks:
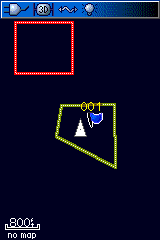
Opening an area shapefile with two polygons in GPS TrackMaker, and following a similar procedure, uploads two separate tracks to the GPS, each one representing the perimeter of an area polygon in the original shapefile:
A point shapefile is imported into the GPS in a similar fashion, but you’d click on the “Waypoints” button to upload those instead of the “Tracklogs” button.
DNRGarmin – This program was introduced earlier for use in exporting GPS data into shapefile format with Garmin GPS units. It can also be used for importing shapefile data into Garmins as well, but there are a few quirks that make it trickier and less convenient to use than GPS TrackMaker:
1. DNRGarmin assumes that the shapefile you’re opening will be in the projection set in the File => Set Projection menu. This can be useful if you have a shapefile already in an alternate coordinate system (like UTM), and you want DNRGarmin to handle the job of re-projecting it to WGS84 geographic coordinates. But it will not check to make sure that the coordinates are in the projection it’s set for; if you have the projection set for UTM, and the shapefile you’re importing is already in geographic coordinates, DNRGarmin will re-project the geographic coordinates as if they were UTM coordinates, and the resulting set of points will be garbage. For that reason, I think it’s best to leave the DNRGarmin projection set at the default of WGS84, no projection, only change it if absolutely necessary, and make sure the shapefile you’re importing is WGS84 lat/long .
2. When you upload a line or area shapefile, the tracks are uploaded into the active track, not the track directory, and aren’t assigned separate names based on a data or attribute field. You’ll have to manually save the uploaded active track into the track directory, and assign it a name manually. And before you upload, you should clear out any active track points currently in memory, so that data won’t get mixed in with, and saved with, the uploaded data.
3. Sometimes, DNRGarmin will handle line shapefiles oddly, connecting lines that were separate in the original file. Here’s an example of this, using the same line shapefile shown above with GPS TrackMaker:
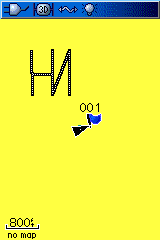
It’s added an additional track from the bottom right of the “H” to the top of the “I” that wasn’t in the original file. Just to confuse things, it doesn’t always do this, but watch out for it.
If you do use DNRGarmin, the process is straightforward:
– Load the shapefile into the program (watch out for the projection!)
– Select the “Waypoint” radio button if you want the individual shapefile vertices to all be imported as waypoints; choose “Track” if you want them imported into the active tracklog. You would probably want to select “Track” for either line or area shapefiles.
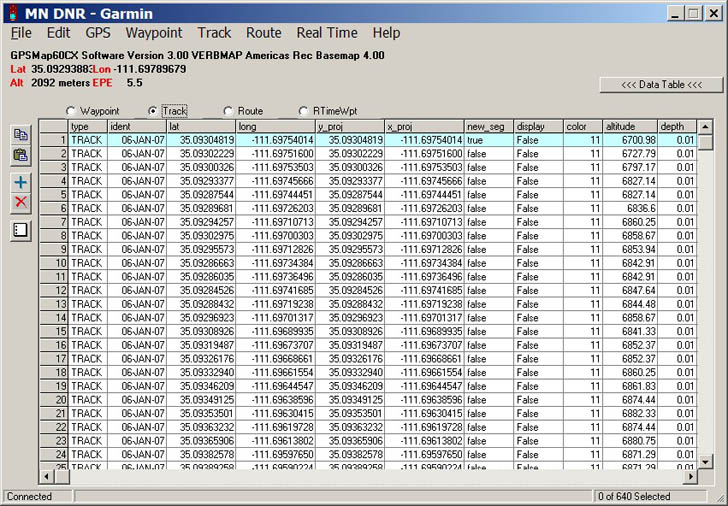
Then select “Upload” from either the Waypoint or Track menu, and the points/tracks will be uploaded to your GPS’s active track log; then save the active track log to the track directory, and assign it a name for identification purposes. Not too complicated, but I prefer using GPS TrackMaker, even though I own a Garmin GPS.
GPS Utility can also import shapefiles, and upload the data to a GPS unit, but as mentioned in an earlier post there are limitations on the software that may render it unsuitable unless you pay the registration fee.
Finally, if you own a mapping Garmin unit, and are a glutton for punishment, you could always convert shapefiles into .img files for uploading as Garmin maps. In some ways this is the best solution, but it’s also the most complicated – perhaps a topic for another day.

You can open multiple GIS file formats in OziExplorer and them export them to your GPS as tracks. I believe you can do this with the free version by opening them on a “blank map.”
Linux users can use GPSBabel to upload/download any data to/from various GPS units. QuantumGIS can serve as GUI frontend for GPSBabel. It will work on Windows and MacOS X too.
Quantum GIS does work as a frontend for GPSBabel in Windows, but you can’t save the imported GPS data in shapefile format, only in GPX format. GPSBabel handles shapefiles only through the command line interface, and doesn’t always handle them correctly. I’ve never been able to successfully upload data to my GPS unit (Garmin 60Cx) using GPSBabel in Windows, only download. Don’t have Linux, so I can’t comment on that.
1. QGIS now lets you save the shapefiles.
2. I was just toying with GPSkmlshp which should work if you want to do it all command line or embed it in your application.
Yes, qGIS now does support saving GPX data as shapefiles – thanks for that. But you still can’t import shapefile data into a GPS from qGIS – it only supports uploading a GPX data layer, and even there I had trouble getting it to work.
I’ve never heard of “GPSkmlshp” – where can I find it?